10 Easy Nut-Free Lunchbox Ideas for Busy Days
Finding quick and delicious lunchbox ideas that are nut-free can be a challenge, especially when you want to keep things fun and varied. Whether you’re packing for picky eaters or just looking to simplify your lunch prep, we’ve compiled a list of ten tasty options that save you time and hassle while still being nutritious. Say goodbye to the lunchbox rut and say hello to some easy and satisfying meals!
Savory Egg Muffins Loaded with Spinach

These savory egg muffins are a delicious and easy option for lunchboxes. Packed with spinach and topped with a sunny-side-up egg, they offer a great blend of flavors and textures. Each bite is fluffy and satisfying, making them a perfect choice for anyone looking for a nutritious meal that can be prepared in advance.
Making these egg muffins is simple and requires minimal ingredients. You can whip them up in no time, and they store well in the fridge or freezer. Just pop them in your lunchbox, and you’ll have a hearty meal ready to go!
Ingredients
- 8 large eggs
- 2 cups fresh spinach, chopped
- 1/2 cup shredded cheese (cheddar or mozzarella)
- 1/4 cup milk
- Salt and pepper to taste
- Cooking spray or oil for greasing
Instructions
- Preheat the oven to 350°F (175°C) and grease a muffin tin with cooking spray or oil.
- In a large bowl, whisk together the eggs, milk, salt, and pepper until well combined.
- Stir in the chopped spinach and shredded cheese until evenly distributed.
- Pour the egg mixture into the prepared muffin tin, filling each cup about 3/4 full.
- Bake for 20-25 minutes or until the muffins are set and lightly golden on top.
- Allow to cool slightly before removing from the tin. Store in an airtight container in the fridge or freeze for later use.
Creamy Hummus and Veggie Sticks
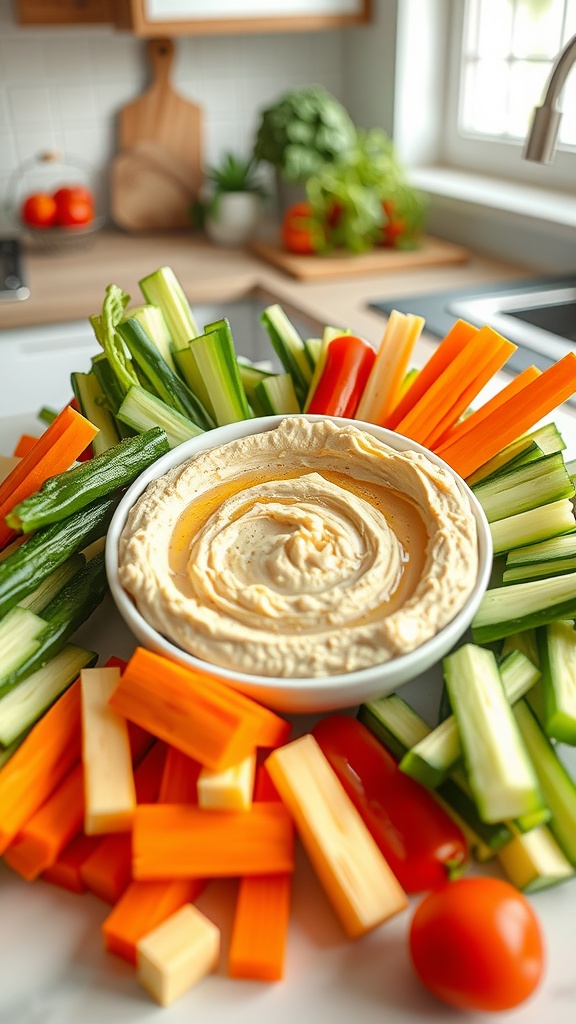
This creamy hummus paired with crunchy veggie sticks makes for a delightful and healthy lunchbox option. The rich, smooth texture of the hummus combined with the fresh, crisp veggies provides a satisfying snack that’s both nutritious and flavorful. It’s super easy to make, which is perfect for anyone looking to save time during busy weekdays.
The taste is a lovely balance of savory and mild, with the hummus offering a creamy base that complements the natural sweetness of the veggies. It’s a fun way to include a variety of colors and nutrients in your meal, making eating healthy feel exciting rather than boring.
Ingredients
- 1 can (15 oz) chickpeas, drained and rinsed
- 1/4 cup tahini
- 2 tablespoons olive oil
- 2 tablespoons lemon juice
- 1 clove garlic, minced
- Salt to taste
- 3-4 tablespoons water (adjust for desired consistency)
- Vegetable sticks (carrots, celery, cucumber, bell peppers, etc.)
Instructions
- Prepare the Hummus: In a blender or food processor, combine chickpeas, tahini, olive oil, lemon juice, garlic, and a pinch of salt. Blend until smooth.
- Adjust Consistency: Gradually add water until you reach your preferred hummus consistency. Taste and add more salt or lemon juice if needed.
- Prepare the Veggies: While the hummus is blending, cut your choice of vegetables into sticks or bite-sized pieces.
- Serve: Transfer the hummus to a bowl and arrange the veggie sticks around it. Enjoy as a tasty, crunchy snack!
Mini Pita Pockets with Turkey and Cheese
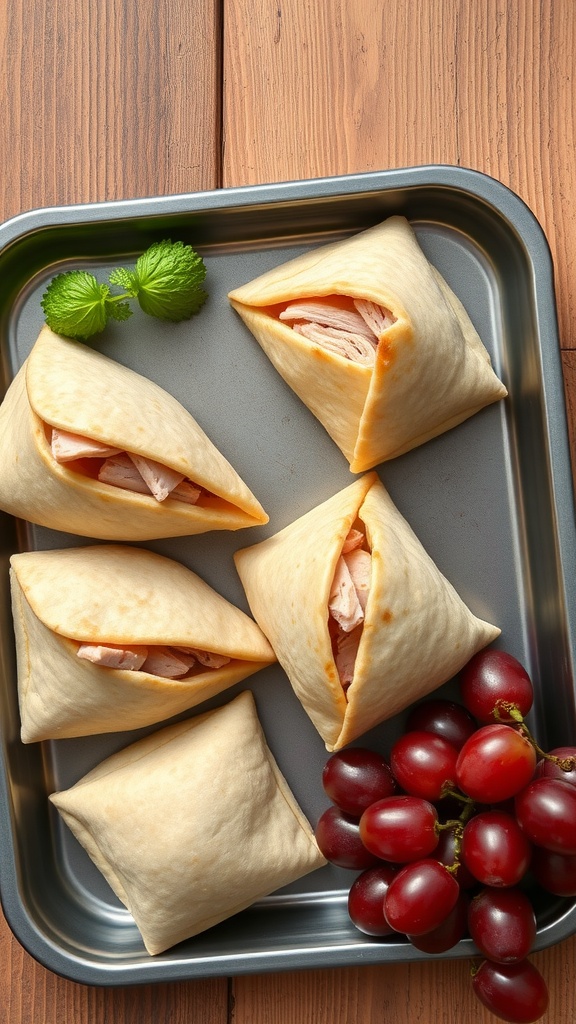
Mini pita pockets filled with turkey and cheese are a fantastic option for lunch. They are simple to prepare, making them perfect for busy days. You get a delightful mix of savory turkey and creamy cheese in a soft pita, creating a satisfying bite every time.
These pockets are not just easy to make; they also taste great. The combination of flavors works well together, and kids love them too. You can customize the fillings to suit your taste, adding veggies or your favorite spreads. Plus, they can be made ahead of time, making them a great choice for lunchboxes!
Ingredients
- 4 mini pitas
- 8 slices of turkey deli meat
- 4 slices of cheese (cheddar or Swiss work well)
- 1/2 cup lettuce or spinach
- 1/4 cup diced tomatoes
- 1 tablespoon mustard or mayonnaise (optional)
Instructions
- Prepare the Pitas: Gently warm the mini pitas in a microwave or oven for about 10 seconds to make them easier to fill.
- Layer the Ingredients: Open each pita and layer in turkey slices and cheese. Add lettuce, tomatoes, and a spread if desired.
- Close and Pack: Fold the pita over carefully to close it. Place them in a lunchbox or container, and they are ready to go!
Quinoa Salad with Cherry Tomatoes and Cucumbers
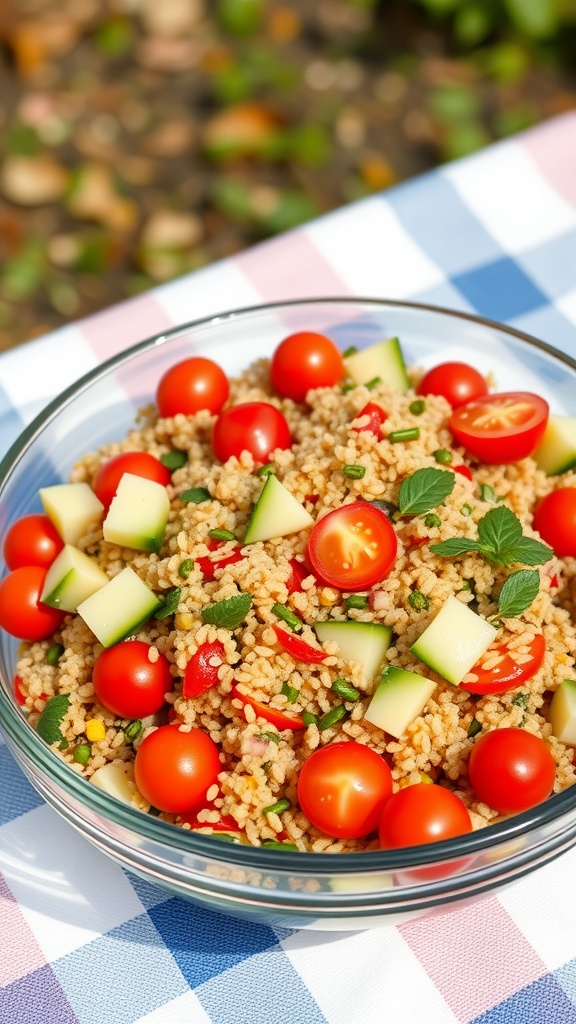
This quinoa salad is a fresh and vibrant dish that’s perfect for lunch or a side. The juicy cherry tomatoes and crunchy cucumbers add a delightful burst of flavor and texture, making each bite a treat. It’s incredibly easy to whip up, meaning you can spend less time in the kitchen and more time enjoying your meal.
Not only is this salad tasty, but it’s also packed with nutrients. Quinoa is a great source of protein, making this salad filling, while the fresh veggies contribute vitamins and minerals. It’s a satisfying option for anyone looking for healthy, nut-free lunch ideas!
Ingredients
- 1 cup quinoa
- 2 cups water
- 1 cup cherry tomatoes, halved
- 1 medium cucumber, diced
- 1/4 cup red bell pepper, diced
- 1/4 cup green onions, sliced
- 1/4 cup fresh parsley, chopped
- 2 tablespoons olive oil
- 1 tablespoon lemon juice
- Salt and pepper to taste
Instructions
- Rinse the quinoa under cold running water to remove any bitterness. In a pot, combine quinoa and water. Bring to a boil, then reduce heat to low, cover, and simmer for about 15 minutes or until all the water is absorbed.
- Once cooked, fluff the quinoa with a fork and let it cool.
- In a large bowl, combine the cooled quinoa with cherry tomatoes, cucumber, red bell pepper, green onions, and parsley.
- In a small bowl, whisk together olive oil, lemon juice, salt, and pepper. Pour the dressing over the salad and toss to combine.
- Serve immediately or refrigerate for an hour to let the flavors meld. Enjoy your refreshing quinoa salad!
Cheesy Cauliflower Rice Bowl
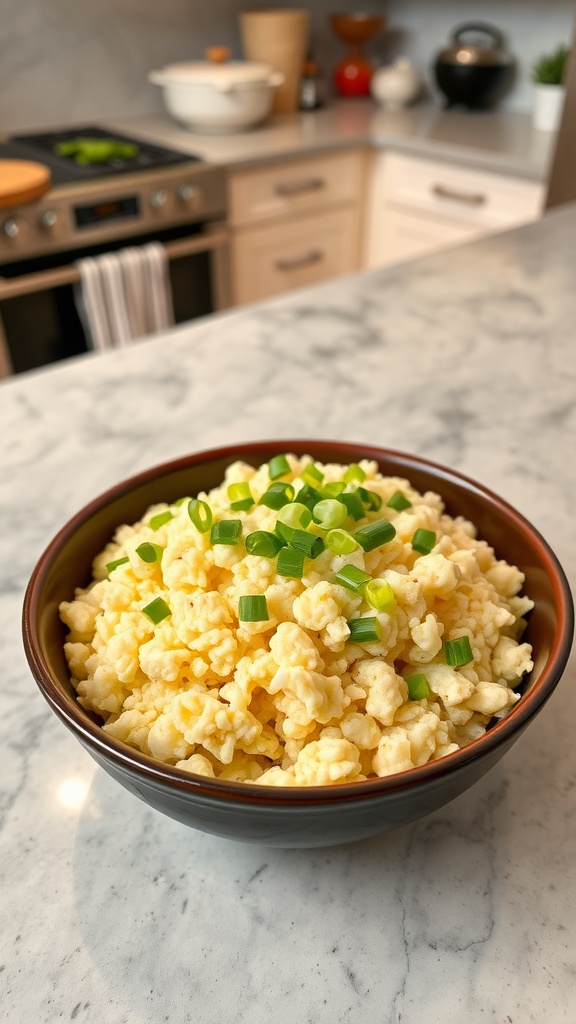
This Cheesy Cauliflower Rice Bowl is a delightful and simple dish that’s perfect for lunchboxes. It’s creamy, cheesy, and has a satisfying texture that makes it a hit for both kids and adults. Plus, it’s quick to whip up, making it an excellent choice for busy days.
The combination of cauliflower and cheese creates a comforting flavor that’s hard to resist. You can easily customize it by adding your favorite veggies or proteins. It’s a nutritious and tasty option that fits seamlessly into a nut-free meal plan.
Ingredients
- 4 cups cauliflower rice
- 1 cup shredded cheese (cheddar or mozzarella works well)
- 1 tablespoon olive oil
- 1/2 teaspoon garlic powder
- Salt and pepper to taste
- 2 green onions, chopped
- Optional: additional veggies (like bell peppers or peas)
Instructions
- Heat olive oil in a large skillet over medium heat. Add cauliflower rice and sauté for about 5 minutes until tender.
- Stir in garlic powder, salt, and pepper. Mix well.
- Reduce heat to low and add the shredded cheese. Stir until melted and creamy.
- Remove from heat and fold in chopped green onions and any additional veggies if using.
- Serve warm or allow to cool before packing into lunchboxes.
Greek Yogurt Parfait with Fresh Fruit
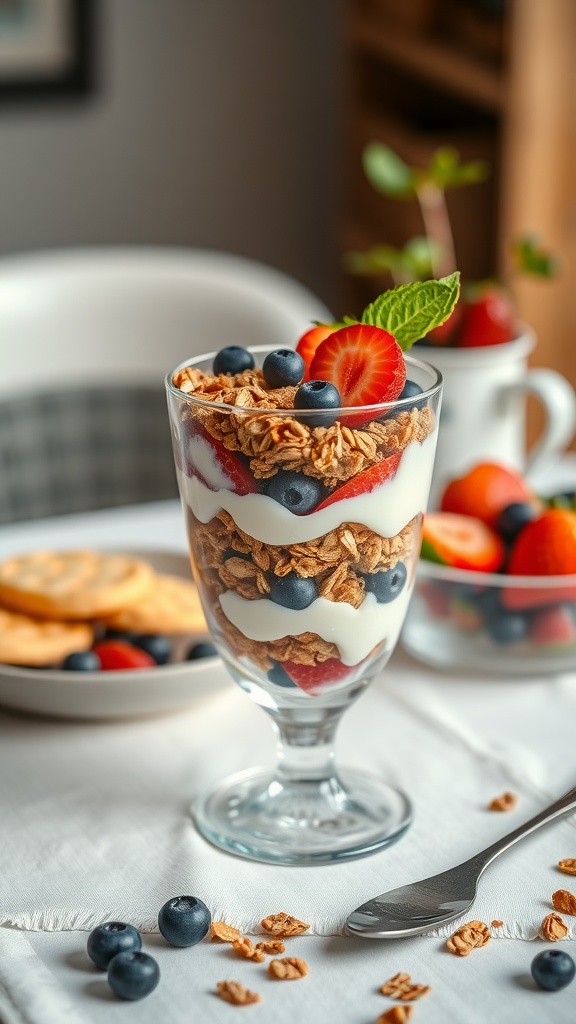
Greek yogurt parfaits are a refreshing and tasty option for lunchboxes. They combine creamy yogurt, juicy fruits, and crunchy granola, making them a delightful treat. This parfait is not only packed with flavor but also provides a good balance of protein, fiber, and vitamins.
Making a Greek yogurt parfait is super easy and quick. Just layer your ingredients in a cup or jar, and you’re ready to go! It’s the perfect make-ahead meal and can be customized with your favorite fruits.
Ingredients
- 2 cups Greek yogurt
- 1 cup granola
- 1 cup mixed fresh fruits (strawberries, blueberries, bananas)
- 1 tablespoon honey (optional)
- Fresh mint leaves for garnish
Instructions
- In a glass or jar, add a layer of Greek yogurt at the bottom.
- Next, add a layer of granola on top of the yogurt.
- Layer in your choice of fresh fruits, then repeat the layers until the glass is filled, finishing with fruits on top.
- Drizzle honey over the top if desired and garnish with mint leaves.
- Cover and store in the fridge until ready to eat.
Zesty Chicken Wraps with Veggies
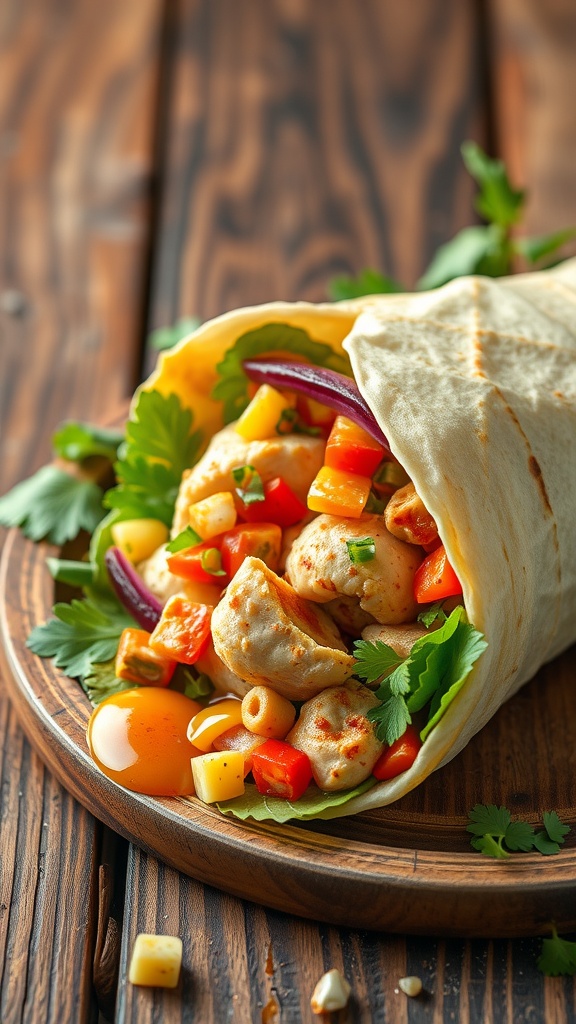
These zesty chicken wraps are a fantastic way to pack flavor and nutrition into a lunchbox. The combination of tender chicken, fresh veggies, and a tangy dressing makes every bite a delight. Plus, they’re super easy to prepare, making them a perfect option for busy days.
With a mix of crunchy peppers, crisp lettuce, and succulent chicken, these wraps are not only tasty but also colorful and appealing. They can be whipped up in no time and are perfect for kids and adults alike!
Ingredients
- 2 cups cooked chicken, shredded
- 1 cup bell peppers, diced
- 1/2 cup red onion, thinly sliced
- 1 cup lettuce, chopped
- 1/2 cup cheese, shredded (optional)
- 4 large tortillas
- 1/4 cup ranch dressing or your favorite dressing
- Salt and pepper to taste
Instructions
- Prepare the Chicken: If using leftover chicken, shred it into bite-sized pieces. You can also cook chicken breasts and season them with salt and pepper, then shred.
- Mix the Veggies: In a large bowl, combine the shredded chicken, diced bell peppers, red onion, and chopped lettuce. Add the dressing and mix well.
- Assemble the Wraps: Lay a tortilla flat and place a generous portion of the chicken and veggie mixture in the center. If using cheese, sprinkle it on top.
- Wrap It Up: Fold the sides of the tortilla over the filling, then roll from the bottom up to form a wrap. Cut in half if desired.
- Pack and Enjoy: Place the wraps in a lunchbox, and they’re ready to go!
Pasta Salad with Italian Dressing and Veggies
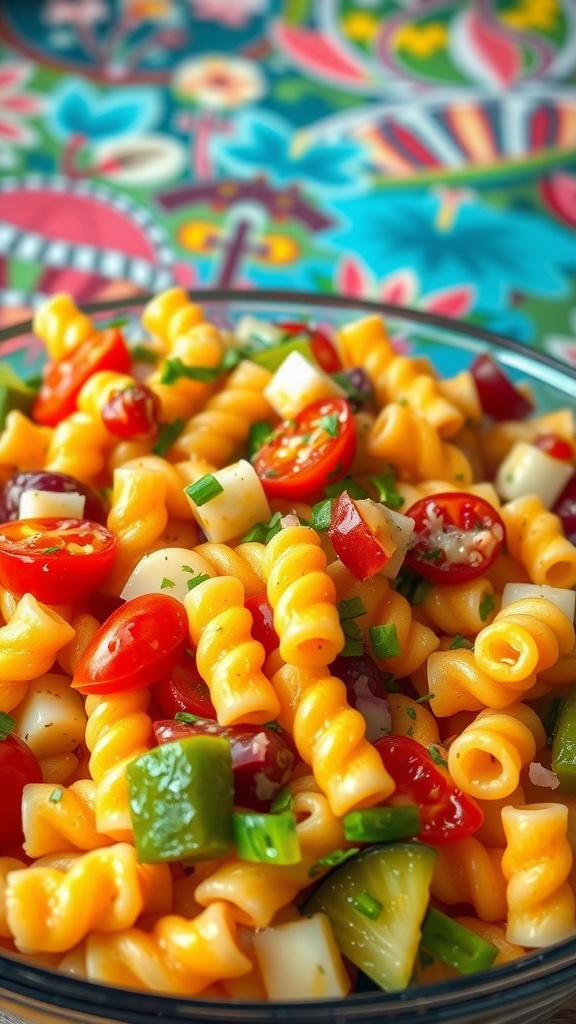
This pasta salad is a vibrant, tasty option for lunchboxes that everyone will enjoy. It’s packed with colorful veggies and tossed in a zesty Italian dressing, making it both refreshing and satisfying.
Best of all, it’s super simple to whip up, requiring just a few ingredients and minimal prep time. Perfect for busy weekdays, this dish can be enjoyed cold or at room temperature, making it a versatile choice for meal prep.
Ingredients
- 2 cups pasta (fusilli or rotini works well)
- 1 cup cherry tomatoes, halved
- 1 cup cucumbers, diced
- 1/2 cup bell peppers, chopped
- 1/2 cup mozzarella cheese, cubed
- 1/4 cup red onion, finely chopped
- 1/4 cup Italian dressing
- Salt and pepper to taste
Instructions
- Cook the Pasta: Bring a pot of salted water to a boil. Add the pasta and cook according to package instructions until al dente. Drain and rinse under cold water.
- Mix the Ingredients: In a large bowl, combine the cooked pasta, cherry tomatoes, cucumbers, bell peppers, mozzarella cheese, and red onion.
- Add Dressing: Pour the Italian dressing over the salad. Toss everything together until well coated. Season with salt and pepper to taste.
- Chill and Serve: Let the pasta salad sit in the fridge for at least 30 minutes before serving. This allows the flavors to meld together.
Fruit Skewers with Yogurt Dip

Fruit skewers are a fun and easy lunchbox idea that adds a splash of color and flavor to your day. These tasty treats combine a variety of fresh fruits, which provide natural sweetness and a refreshing crunch. Paired with a creamy yogurt dip, they make a delightful snack that kids and adults will both enjoy.
Making fruit skewers is a breeze. Simply cut your favorite fruits into bite-sized pieces, slide them onto wooden skewers, and serve alongside yogurt for dipping. It’s a quick way to pack a nutritious lunch that feels like a treat!
Ingredients
- 1 cup strawberries, hulled
- 1 cup pineapple, cubed
- 1 cup green grapes
- 1 cup cantaloupe, cubed
- 1 cup blueberries
- 1 cup yogurt (plain or flavored)
- 1 tablespoon honey (optional)
- Wooden skewers
Instructions
- Prepare the Fruit: Wash and cut the fruits into bite-sized pieces. Keep the strawberries whole if they are small, or halve them if they are larger.
- Assemble the Skewers: Take a wooden skewer and thread the pieces of fruit onto it, alternating colors and varieties for a vibrant look.
- Make the Yogurt Dip: In a small bowl, mix the yogurt with honey for added sweetness if desired.
- Serve: Arrange the fruit skewers on a plate and serve with the yogurt dip in the center for easy dipping.
Veggie Sushi Rolls with Avocado

Veggie sushi rolls with avocado are a fun and tasty way to enjoy a light lunch. These rolls are filled with fresh vegetables and creamy avocado, making them both nutritious and satisfying. They’re easy to prepare, perfect for lunchboxes, and can be customized based on what you have on hand.
The combination of crisp veggies and smooth avocado creates a delightful contrast in texture. Plus, sushi rolls are always a hit, whether you’re at home or on the go. Get ready to roll up some deliciousness!
Ingredients
- 1 cup sushi rice
- 2 cups water
- 4 sheets nori (seaweed)
- 1 ripe avocado, sliced
- 1/2 cucumber, julienned
- 1 small carrot, julienned
- 1 bell pepper, thinly sliced
- Soy sauce, for dipping
Instructions
- Cook the sushi rice by rinsing it under cold water and then boiling it with 2 cups of water. Once boiling, reduce the heat, cover, and simmer for about 20 minutes until the rice is tender.
- Let the rice cool slightly before laying a sheet of nori on a bamboo mat.
- Spread a thin layer of sushi rice over the nori, leaving about an inch at the top. Ensure the rice is evenly spread.
- Place slices of avocado, cucumber, carrot, and bell pepper along the bottom edge of the nori.
- Using the bamboo mat, carefully roll the sushi away from you, pressing gently to form a tight roll.
- Once rolled, slice into bite-sized pieces and serve with soy sauce for dipping.