10 Fun and Creative Lunchbox Ideas Your Kids Will Adore
Lunchboxes can be a canvas for creativity, and finding exciting meals can make lunchtime a highlight for kids. Here are ten fun and tasty lunchbox ideas that will keep them excited about eating away from home, turning mealtime into a delightful break their day!
Taco-Inspired Bento
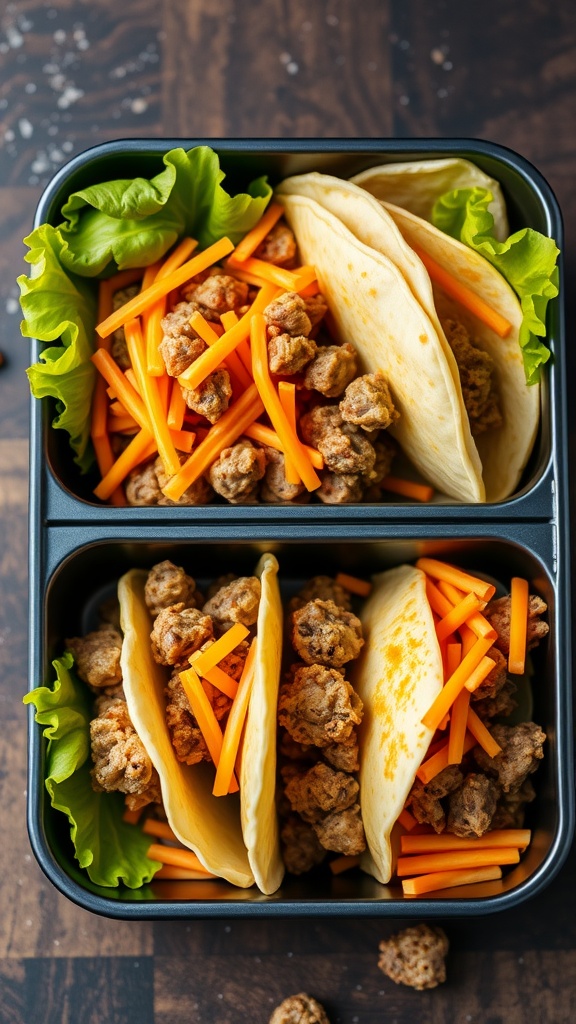
Kids love tacos, and with this taco-inspired bento, you can bring that fun to lunchtime! This recipe combines delicious flavors and vibrant colors, making it appealing and nutritious. It’s simple to prepare and allows for creativity in packing different ingredients, keeping lunchtime exciting and tasty.
The bento box is filled with soft tortillas, seasoned meat, and crisp veggies. It’s a balanced meal, rich in protein and vitamins, ensuring your little ones are fueled for their day. Plus, they can customize their tacos with their favorite toppings!
Ingredients
- 4 small tortillas
- 1 pound ground turkey or beef
- 1 teaspoon taco seasoning
- 1 cup shredded lettuce
- 1 cup shredded carrots
- 1/2 cup diced tomatoes
- 1/4 cup shredded cheese
- Optional: salsa or sour cream for dipping
Instructions
- Cook the Meat: In a skillet over medium heat, cook the ground turkey or beef until browned. Drain any excess fat and add taco seasoning. Stir until well combined.
- Prepare the Tortillas: Warm the tortillas in a separate pan or microwave for about 15 seconds until pliable.
- Assemble the Tacos: Lay out the tortillas and fill each with a scoop of the seasoned meat. Top with lettuce, carrots, tomatoes, and cheese.
- Pack the Bento: Arrange the completed tacos in a bento box with extra veggies on the side. Include salsa or sour cream in a small container if desired.
- Serve: Enjoy this fun, taco-packed lunch that kids will love!
Nut Butter and Banana Sushi
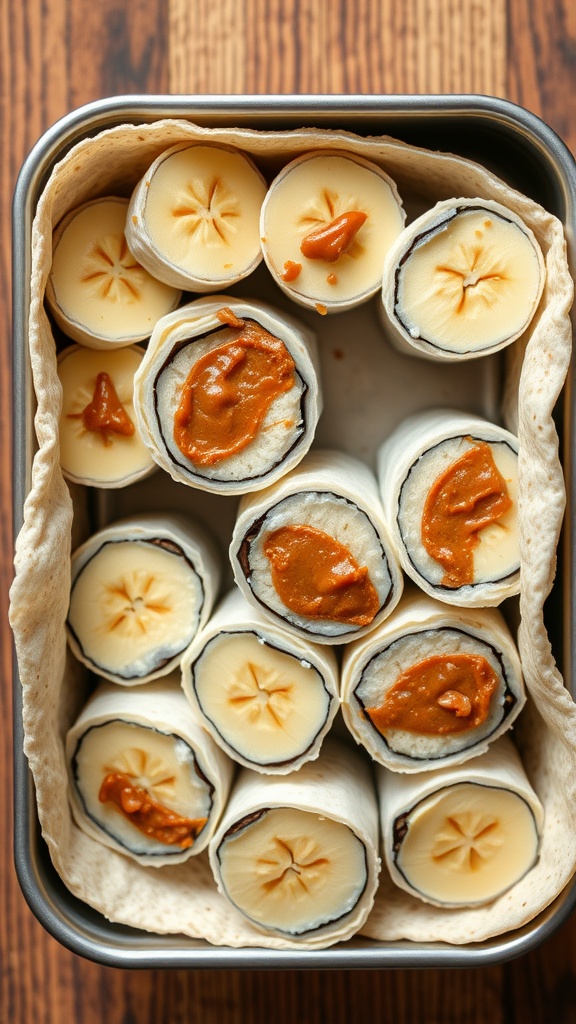
Nut Butter and Banana Sushi is a fun and healthy twist on traditional sushi that kids love. This easy recipe combines creamy nut butter with sweet bananas, all wrapped in a soft tortilla, creating a delightful treat that’s both nutritious and delicious.
The taste is a perfect blend of sweet and nutty, making it a hit for lunchboxes or snacks. Plus, it’s super simple to make, requiring just a few ingredients and minimal prep time, so you can whip it up in no time!
Ingredients
- 2 large tortillas
- 2 bananas
- 1/4 cup nut butter (peanut, almond, or your choice)
- 1 tablespoon honey (optional)
Instructions
- Spread a thin layer of nut butter on each tortilla.
- Place a banana at one end of each tortilla and sprinkle with honey if desired.
- Roll the tortilla tightly around the banana until fully wrapped.
- Slice the wraps into bite-sized pieces, resembling sushi rolls.
- Pack into a lunchbox and enjoy!
Veggie Sushi Rolls
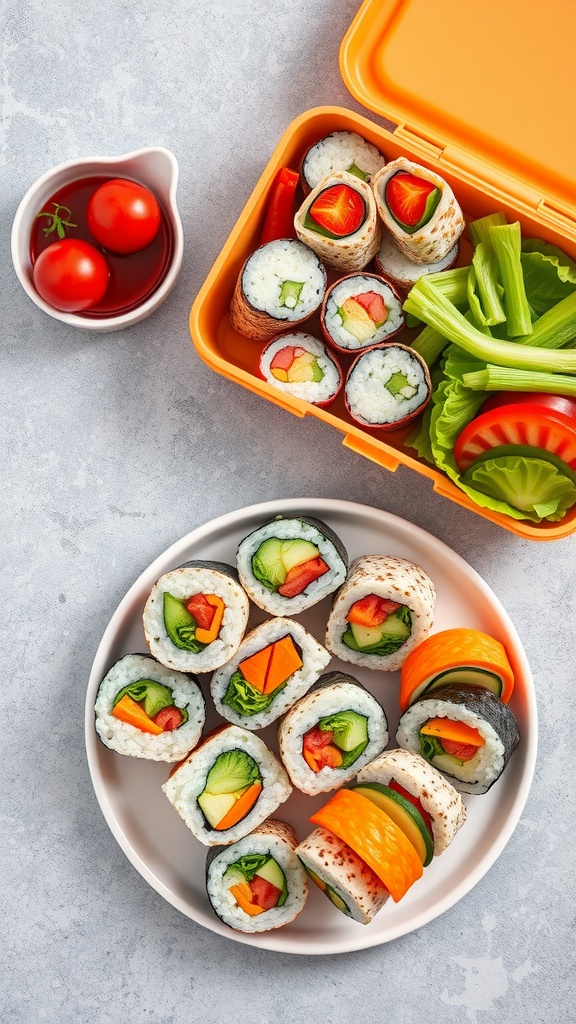
Veggie sushi rolls are a fun and healthy way to bring some excitement to lunchboxes. They’re not only colorful and visually appealing, but they’re also packed with fresh flavors that kids will love. The combination of crisp vegetables and soft rice creates a delightful texture that makes each bite satisfying. Plus, these rolls are simple to make, allowing kids to get involved in the kitchen!
These sushi rolls can be customized with your child’s favorite veggies, making them a great way to sneak in some extra nutrition. Whether you use cucumbers, carrots, or bell peppers, the options are endless. Serve them with soy sauce or a dip of your choice for an added punch of flavor. Here’s a quick recipe to make your own veggie sushi rolls at home:
Ingredients
- 1 cup sushi rice
- 2 cups water
- 2 tablespoons rice vinegar
- 1 tablespoon sugar
- 1 teaspoon salt
- Nori sheets
- 1 cucumber, julienned
- 1 carrot, julienned
- 1 bell pepper, sliced
- 1 avocado, sliced
Instructions
- Cook the Sushi Rice: Rinse the sushi rice under cold water until the water runs clear. Combine the rice and water in a pot and bring to a boil. Reduce heat, cover, and simmer for 18-20 minutes. Allow to cool slightly.
- Season the Rice: In a small bowl, mix rice vinegar, sugar, and salt until dissolved. Stir this mixture into the warm rice, ensuring it’s evenly coated.
- Prepare the Sushi Rolls: Lay a sheet of nori on a bamboo mat. Spread a thin layer of sushi rice over the nori, leaving a small border at the top. Arrange your choice of vegetables in a line across the rice.
- Roll the Sushi: Starting from the bottom, use the mat to roll the sushi tightly away from you, pressing gently. Seal the edge with a little water.
- Slice and Serve: Cut the roll into bite-sized pieces with a sharp knife. Serve with soy sauce for dipping.
Homemade Trail Mix
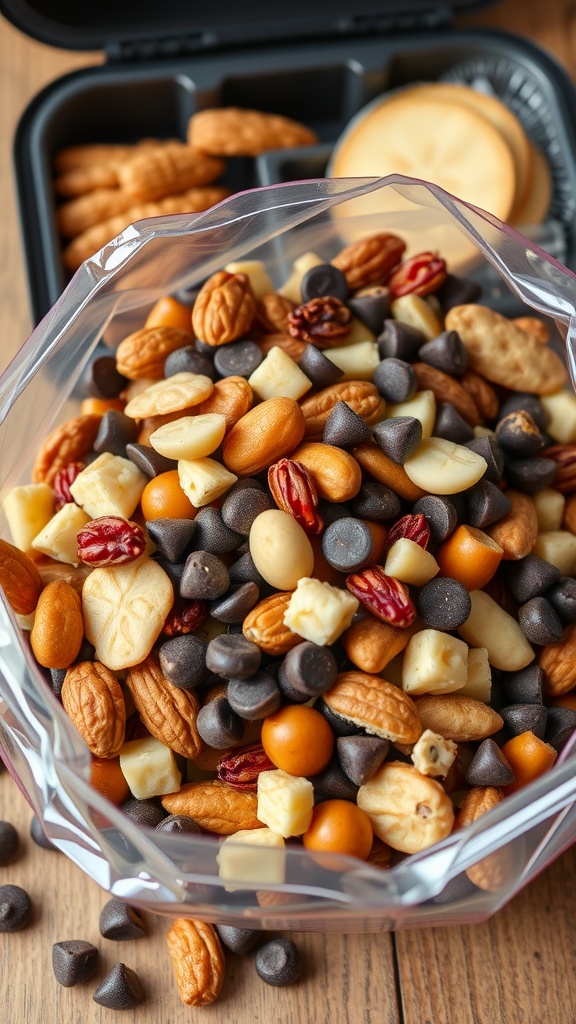
Homemade trail mix is a fun and easy snack that kids will love to munch on during lunch or after school. It combines a mix of nuts, dried fruits, and chocolate for a balance of sweetness and crunch. You can customize the ingredients based on your child’s preferences, making it a versatile option.
This recipe is simple to whip up, taking only a few minutes to gather and mix everything together. Plus, kids can help with the assembly, making it a great way to spend some quality time in the kitchen.
Ingredients
- 1 cup almonds
- 1 cup walnuts
- 1 cup dried cranberries
- 1 cup mini chocolate chips
- 1 cup sunflower seeds
- 1 cup dried pineapple, chopped
- 1/2 cup cashews
Instructions
- In a large bowl, combine all the ingredients: almonds, walnuts, dried cranberries, mini chocolate chips, sunflower seeds, dried pineapple, and cashews.
- Mix everything together until well combined.
- Store the trail mix in an airtight container or divide it into small bags for easy lunchbox packing.
- Enjoy as a snack anytime!
Fruit and Cheese Kabobs
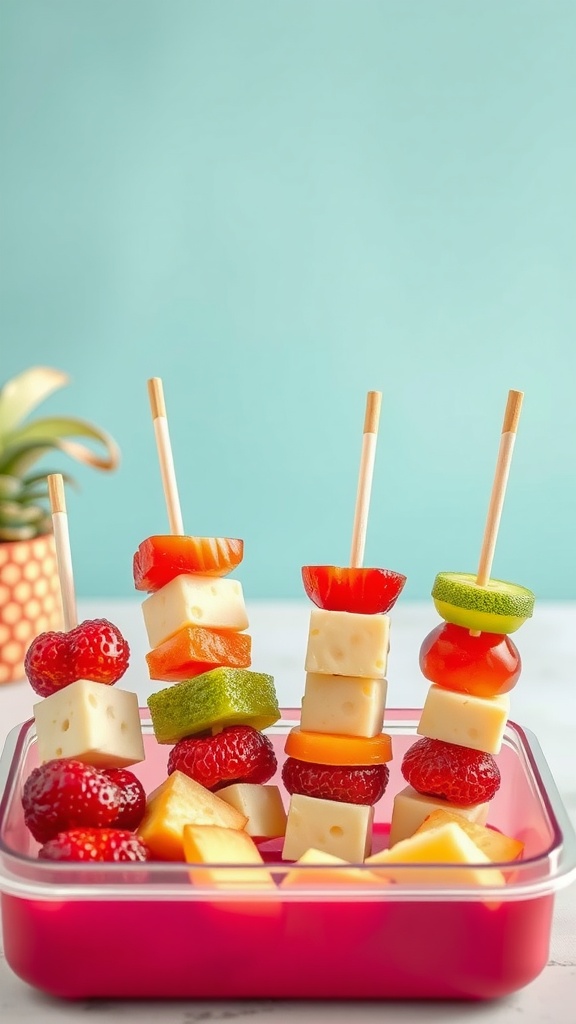
Fruit and cheese kabobs are a fantastic way to make lunchtime exciting! These colorful skewers combine the sweetness of fresh fruit with the creamy texture of cheese, creating a delightful balance of flavors. They’re not only tasty but also super easy to assemble, making them a perfect choice for busy parents and picky eaters alike.
The combination of juicy fruits like strawberries, melons, and grapes with different types of cheese adds a fun twist. Kids can help in making them, turning lunchtime into a creative activity. Plus, they’re portable and perfect for lunchboxes, picnics, or after-school snacks!
DIY Mini Pita Pizzas
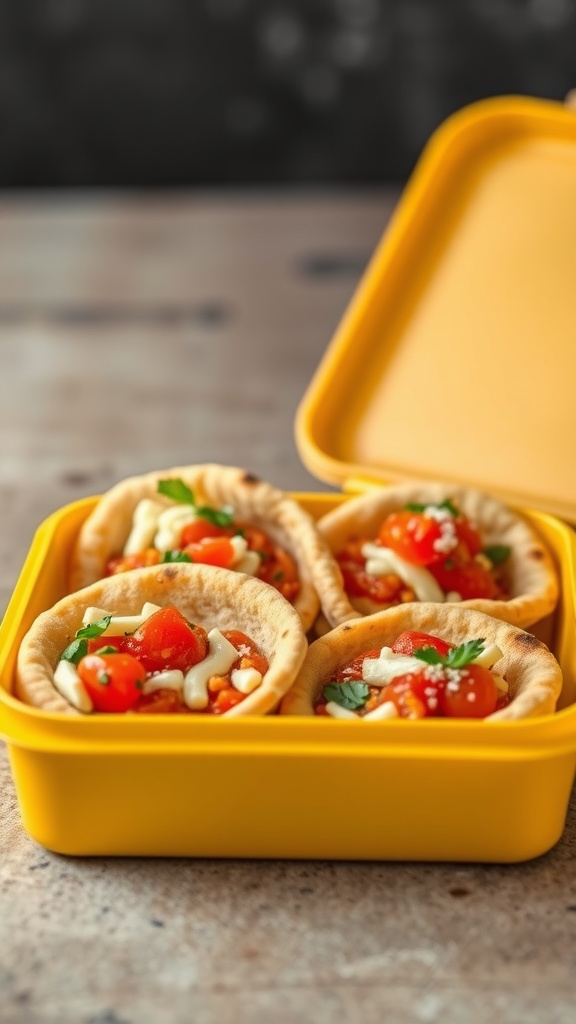
Mini pita pizzas are a fun and easy way to bring creativity to lunchtime. These bite-sized treats pack all the flavors of traditional pizza but with a twist that kids will love. They are crispy, cheesy, and can be customized to fit any taste preference, making them a hit for both kids and parents alike.
Quick to prepare, you can involve the little ones in the assembly process. Let them choose their favorite toppings, and watch their eyes light up as they create their own personal pizzas. Perfect for lunchboxes, these mini pizzas are not only tasty but also a great way to sneak in some veggies!
Ingredients
- 4 small pita bread
- 1/2 cup marinara sauce
- 1 cup shredded mozzarella cheese
- 1/2 cup cherry tomatoes, diced
- 1/4 cup bell pepper, diced
- 1/4 cup black olives, sliced
- 1/4 teaspoon dried oregano
- Fresh basil leaves for garnish (optional)
Instructions
- Preheat the oven to 400°F (200°C).
- Place the pita breads on a baking sheet. Spread a tablespoon of marinara sauce on each pita.
- Sprinkle shredded mozzarella cheese evenly over the sauce.
- Add diced cherry tomatoes, bell peppers, and olives on top of the cheese.
- Sprinkle dried oregano over the toppings.
- Bake for about 10-12 minutes, or until the cheese is melted and bubbly.
- Remove from the oven and let cool for a few minutes. Garnish with fresh basil leaves if desired. Cut into quarters and pack them in lunchboxes!
Mini Quiches in Muffin Cups
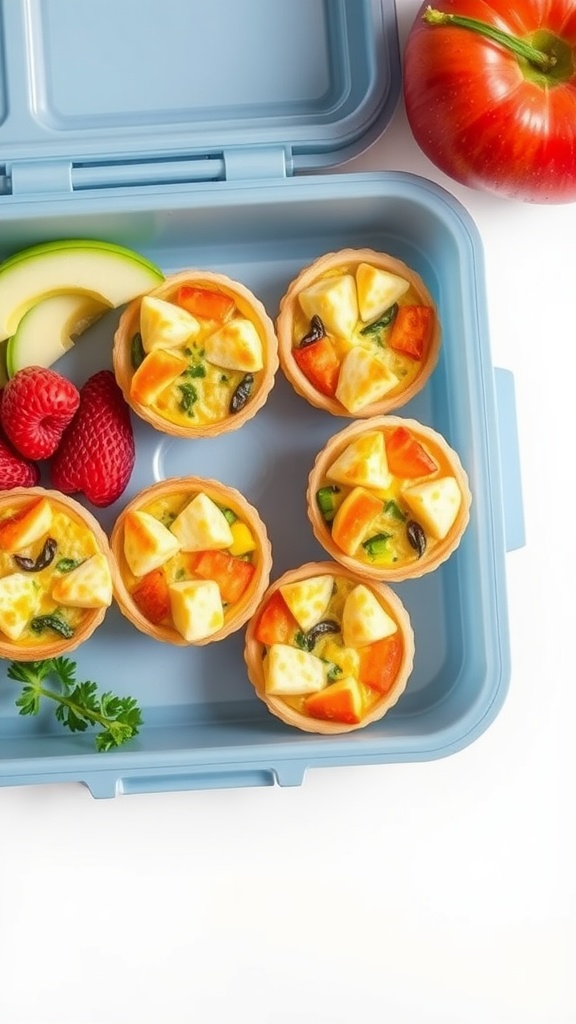
Mini quiches in muffin cups are a fun and tasty option for lunchboxes that kids will enjoy. These bite-sized delights are filled with eggs, veggies, and cheese, making them packed with flavor and nutrition. Plus, they are super easy to make!
Perfect for little hands, these mini quiches can be customized with your child’s favorite ingredients. Whether it’s spinach, bell peppers, or cheese, you can mix and match to create a yummy treat that keeps lunchtime exciting.
Ingredients
- 6 large eggs
- 1 cup milk
- 1 cup shredded cheese (cheddar or your choice)
- 1 cup diced vegetables (like bell peppers, spinach, or zucchini)
- 1/2 teaspoon salt
- 1/2 teaspoon black pepper
- 1 package pre-made pastry dough or phyllo dough
Instructions
- Preheat the oven to 375°F (190°C).
- Roll out the pastry dough and cut into circles that fit muffin tins. Press the dough into the cups of a greased muffin tin.
- In a bowl, whisk together the eggs, milk, salt, and pepper until well combined.
- Add in the diced vegetables and cheese, mixing gently.
- Pour the egg mixture into each pastry cup, filling them about 3/4 full.
- Bake for 20-25 minutes or until the egg is set and the tops are lightly golden.
- Allow to cool slightly before removing from the muffin tin. Enjoy warm or store in the refrigerator for later!
Rainbow Veggie Wraps
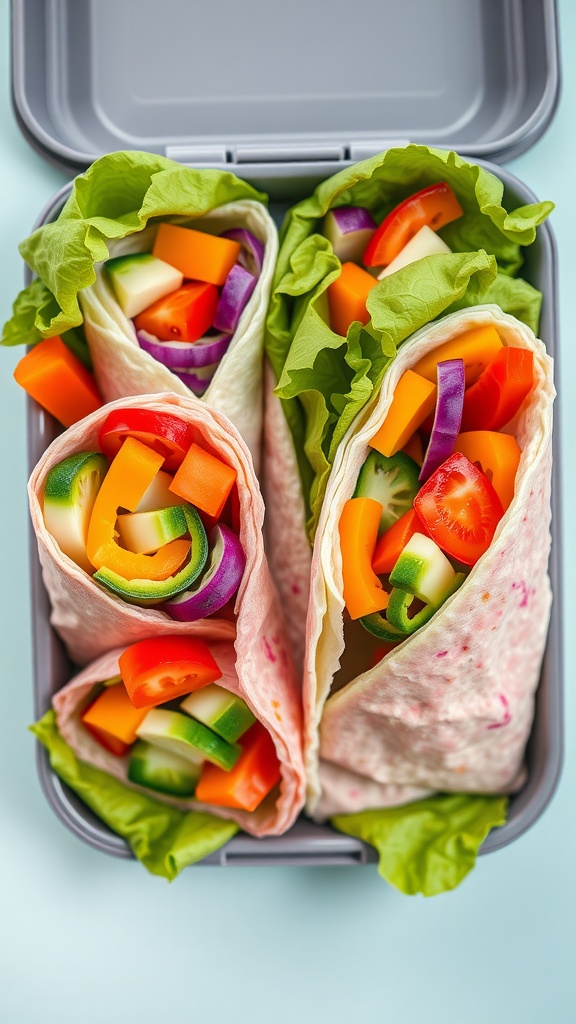
Rainbow Veggie Wraps are a fun and colorful way to pack healthy veggies into a lunchbox. Bursting with flavors and textures, these wraps are not only nutritious but also visually appealing, making them a hit with kids. Easy to assemble, they can be customized with a variety of vegetables, allowing kids to pick their favorites.
These wraps have a fresh taste, featuring crisp veggies wrapped in a soft tortilla, making them perfect for lunch or snacks. You can even add a spread or dip for extra flavor. Plus, they’re simple enough for kids to help make, adding a little extra fun to lunchtime!
Ingredients
- 4 large whole wheat tortillas
- 1 cup hummus or cream cheese
- 1 cup shredded lettuce
- 1 medium cucumber, sliced
- 1 bell pepper (any color), sliced
- 1 medium carrot, grated
- 1 small zucchini, sliced
- 1/2 cup purple cabbage, shredded
Instructions
- Spread a layer of hummus or cream cheese on each tortilla, covering it evenly.
- Layer the shredded lettuce on top of the spread.
- Add slices of cucumber, bell pepper, grated carrot, zucchini, and shredded cabbage in a colorful arrangement.
- Carefully roll up each tortilla tightly, starting from one end.
- Slice the wraps in half or into pinwheels for easy eating. Pack them in a lunchbox with a small container of dressing or dip, if desired.
Yogurt Parfait Cups
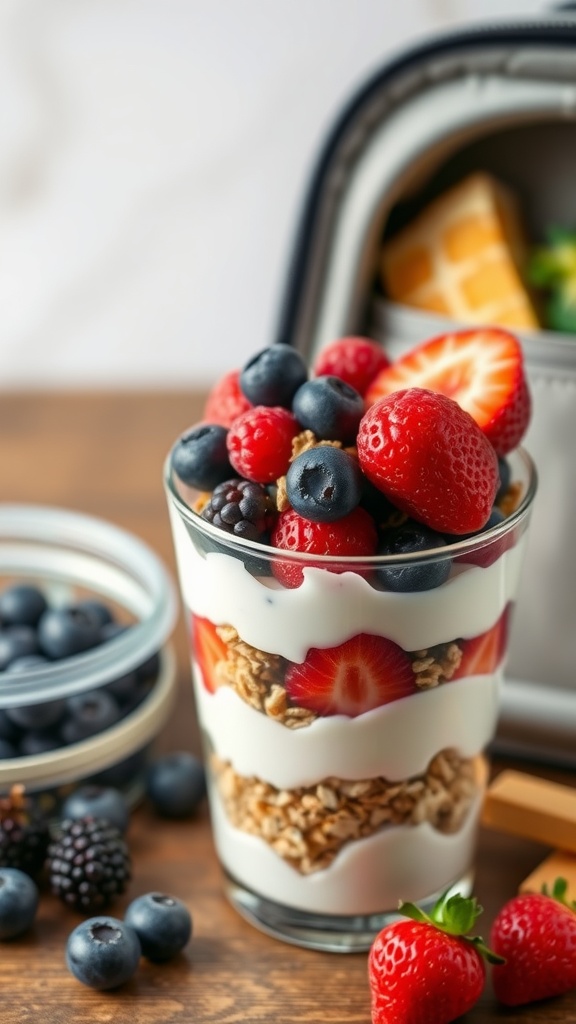
Yogurt parfait cups are a delightful treat that kids adore! They combine creamy yogurt, crunchy granola, and vibrant fruits, creating a perfect mix of textures and flavors. Not only are they visually appealing, but they also offer a balanced snack packed with protein and vitamins.
This recipe is super simple to make, allowing you to whip up a batch in no time. You can customize each cup with your child’s favorite ingredients, making lunch fun and exciting!
Ingredients
- 2 cups yogurt (any flavor)
- 1 cup granola
- 1 cup mixed berries (strawberries, blueberries, raspberries, blackberries)
- 1 tablespoon honey or maple syrup (optional)
Instructions
- In a clear cup or jar, start with a layer of yogurt at the bottom.
- Add a layer of granola on top of the yogurt.
- Next, add a layer of mixed berries.
- Repeat the layers until the cup is nearly full, finishing with a layer of berries on top.
- If desired, drizzle honey or maple syrup over the top for added sweetness.
- Cover and refrigerate until ready to serve.
Stuffed Bell Peppers
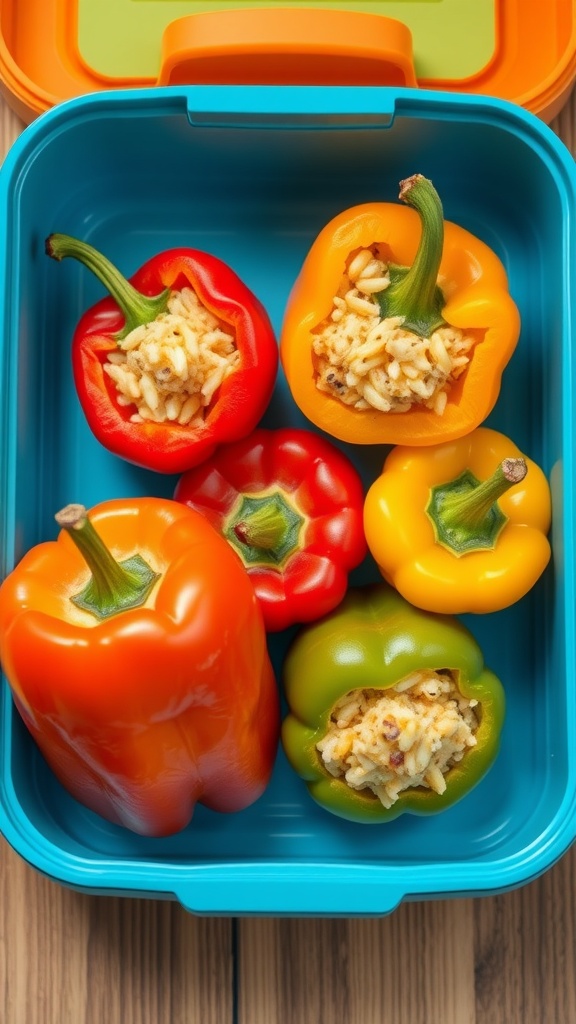
Stuffed bell peppers are a fun and colorful way to pack a nutritious lunch for kids. These vibrant veggies are filled with a tasty mixture that can include rice, meat, and cheese, making them both appealing and satisfying. They are easy to prepare, allowing you to involve your kids in the cooking process, which can make them more excited about lunch.
The delicious blend of flavors makes these stuffed peppers not just a meal but a delightful treat. Plus, they’re portable and can be enjoyed warm or cold, ideal for a lunchbox. Let’s jump into this simple recipe that will surely become a favorite!
Ingredients
- 4 large bell peppers (any color)
- 1 cup cooked rice
- 1/2 pound ground turkey or beef
- 1 cup shredded cheese (cheddar or mozzarella)
- 1/2 cup diced tomatoes (canned or fresh)
- 1 teaspoon Italian seasoning
- Salt and pepper to taste
- Olive oil for drizzling
Instructions
- Preheat your oven to 375°F (190°C).
- Slice the tops off the bell peppers and remove the seeds. Place them upright in a baking dish.
- In a skillet, heat a bit of olive oil over medium heat. Add the ground turkey or beef and cook until browned. Drain excess fat.
- In a mixing bowl, combine the cooked rice, meat, diced tomatoes, half the cheese, Italian seasoning, salt, and pepper.
- Stuff each bell pepper with the mixture, pressing down lightly to pack it in. Top with the remaining cheese.
- Drizzle a little olive oil on top of each pepper and cover the dish with aluminum foil.
- Bake for 25-30 minutes. Remove the foil and bake for an additional 10 minutes, or until the peppers are tender and the cheese is bubbly.
- Let cool slightly before packing them into lunchboxes!