10 Quick and Easy Lunchbox Ideas for Busy Days
Finding quick and easy lunchbox ideas can save tons of time in your busy day. These 10 time-saving lunchbox ideas are designed to make packing meals a breeze, ensuring your kids (and you!) enjoy tasty and nutritious food without hassle. Let’s get into these simple solutions that will streamline your lunch prep!
Mini Frittatas for Protein Boost

Mini frittatas are a fantastic way to pack a protein punch into your lunchbox. These bite-sized treats are not only delicious but also incredibly simple to whip up. With a fluffy texture and a savory taste, they can be customized with your favorite veggies, cheeses, or even leftover meats, making them a versatile option for meal prep.
Perfect for busy days, mini frittatas are easy to make ahead and can be enjoyed warm or cold. They’re great for adults and kids alike, ensuring everyone gets a nutritious boost during lunch. Just pop them into your lunchbox, and you’re set!
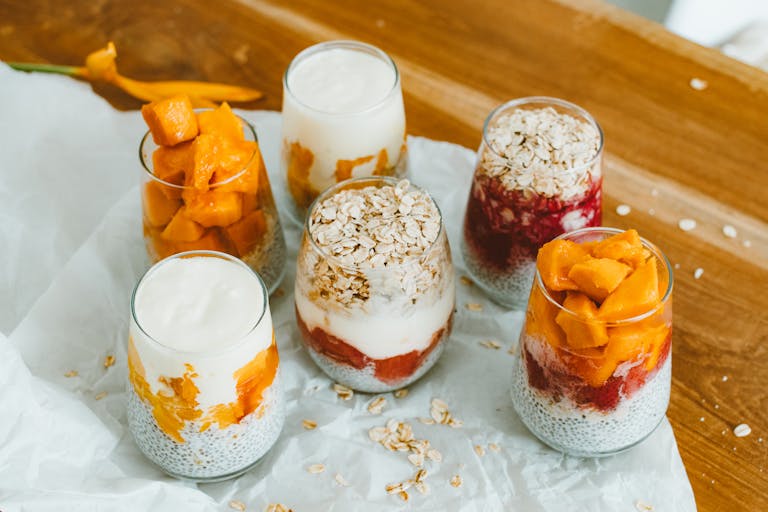
Fruit and Yogurt Parfaits
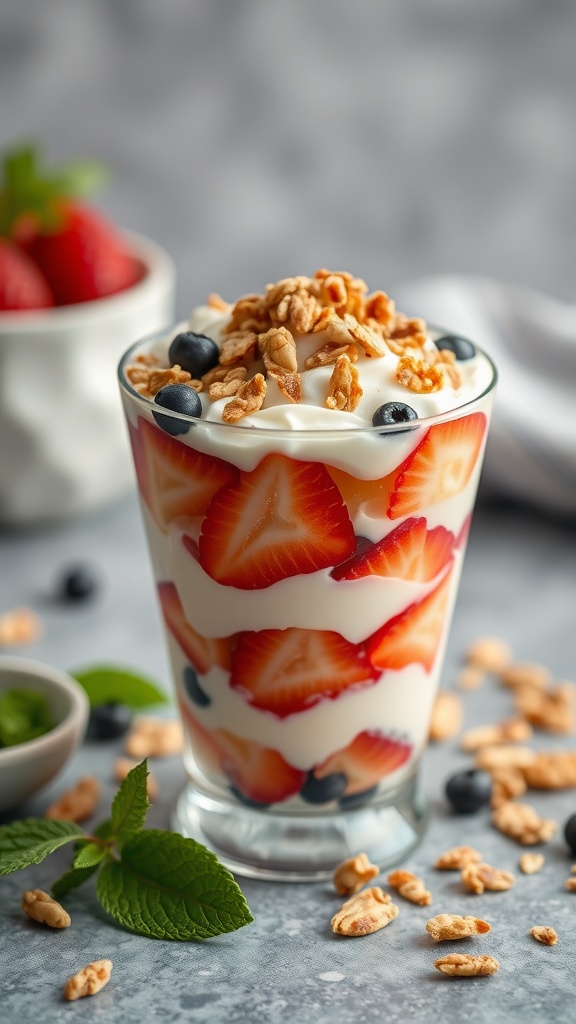
Fruit and yogurt parfaits are a delightful and nutritious option for lunchboxes. They combine creamy yogurt, fresh fruit, and crunchy granola, creating a delicious balance of flavors and textures. The sweetness of the fruit complements the tanginess of the yogurt, making each spoonful a tasty treat that feels indulgent yet healthy.
This recipe is super simple to prepare and perfect for meal prep. You can make them in advance and store them in the fridge for a quick grab-and-go lunch. Kids and adults alike will enjoy this colorful, vibrant dish that satisfies both hunger and a sweet tooth!
Ingredients
- 2 cups of your favorite yogurt (vanilla or Greek works great)
- 1 cup of fresh strawberries, sliced
- 1 cup of fresh blueberries
- 1 cup of granola
- 1 tablespoon of honey (optional)
Instructions
- In a glass or bowl, start by adding a layer of yogurt at the bottom.
- Next, add a layer of sliced strawberries followed by a layer of blueberries.
- Sprinkle a layer of granola over the fruit and yogurt.
- Repeat the layers until you reach the top of the glass, finishing with a layer of yogurt and a sprinkle of granola.
- If you like, drizzle honey on top for an extra touch of sweetness.
- Cover and refrigerate until ready to pack for lunch.
Pasta Salad with Seasonal Veggies
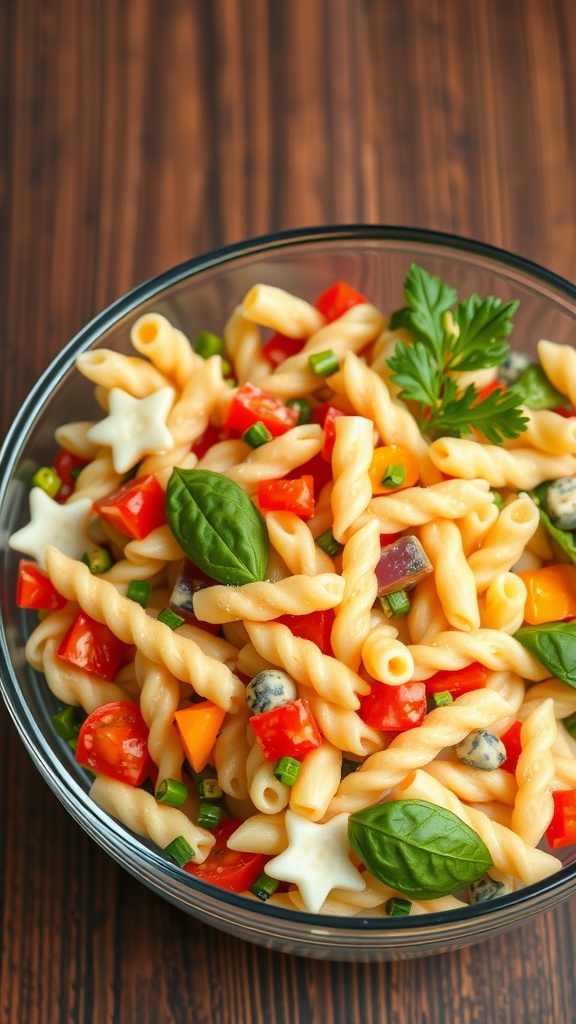
Pasta salad with seasonal veggies is a delightful and colorful dish that’s perfect for lunchboxes. It’s light, refreshing, and packed with flavors from fresh vegetables. Plus, it’s super easy to whip up, making it a go-to option for busy days.
This pasta salad can be customized based on your favorite veggies or what you have on hand. The combination of al dente pasta and crisp, vibrant vegetables creates a satisfying meal that can be enjoyed cold or at room temperature.
Ingredients
- 2 cups pasta (any shape you prefer)
- 1 cup cherry tomatoes, halved
- 1 bell pepper, diced
- 1/2 cup cucumber, chopped
- 1/4 cup red onion, finely chopped
- 1/2 cup olives, sliced
- 1/4 cup feta cheese, crumbled (optional)
- 3 tablespoons olive oil
- 1 tablespoon red wine vinegar
- Salt and pepper to taste
- Fresh basil or parsley for garnish
Instructions
- Cook the Pasta: In a large pot of salted boiling water, cook the pasta according to package instructions until al dente. Drain and rinse under cold water to cool.
- Prepare the Veggies: While the pasta cooks, chop the vegetables. Combine the tomatoes, bell pepper, cucumber, red onion, and olives in a mixing bowl.
- Mix Everything Together: In a large bowl, combine the cooled pasta with the chopped veggies. Add feta cheese if using.
- Dress the Salad: In a small bowl, whisk together olive oil, red wine vinegar, salt, and pepper. Pour over the pasta salad and toss to combine.
- Garnish and Serve: Top with fresh basil or parsley before serving. This salad can be stored in the fridge for a few days, making it a great make-ahead option!
Effortless Wraps with Deli Ingredients
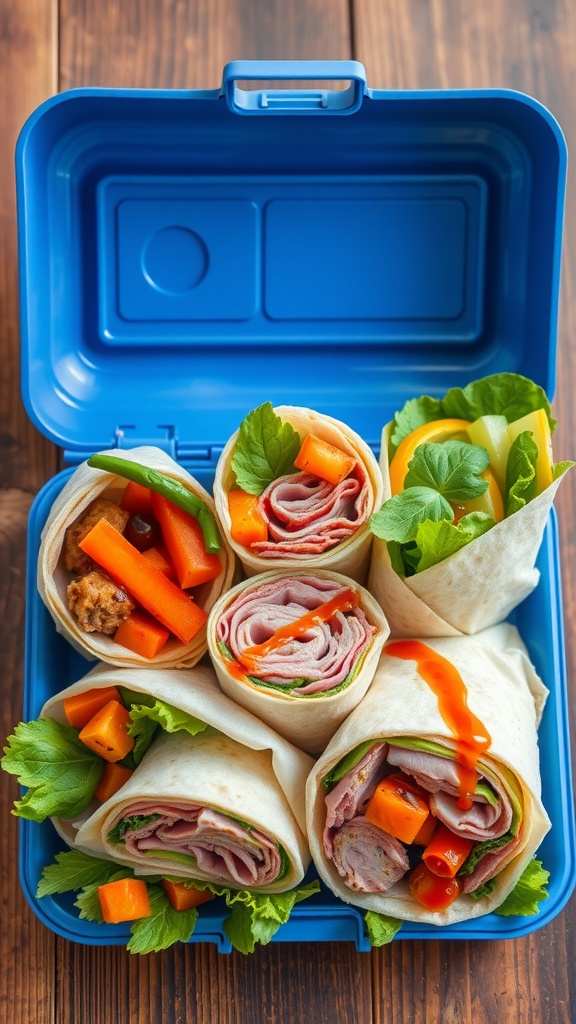
Wraps are a fantastic option for quick lunches, combining flavors and textures in one hand-held delight. Made with deli ingredients, these wraps are not only delicious but also super simple to prepare. You can customize them with your favorite meats, cheeses, and fresh veggies, making each bite a burst of flavor.
Creating these wraps is a breeze, and they can be made in just a few minutes. Perfect for busy days, they are easily packed, portable, and satisfying. Whether you’re at home, at work, or on the go, these wraps offer a tasty meal without the fuss.
Ingredients
- 4 large tortillas
- 8 slices of deli turkey or ham
- 4 slices of cheese (cheddar or Swiss)
- 1 cup lettuce, chopped
- 1/2 cup bell peppers, sliced
- 1/4 cup carrots, grated
- 2 tablespoons mayonnaise or mustard
- Salt and pepper to taste
Instructions
- Prepare the Base: Lay out a tortilla flat on a clean surface.
- Add Spread: Spread a thin layer of mayonnaise or mustard over the tortilla.
- Layer Ingredients: Place 2 slices of deli meat, a slice of cheese, and a handful of veggies in the center of the tortilla.
- Season: Sprinkle with salt and pepper to taste.
- Wrap It Up: Fold in the sides of the tortilla and roll it tightly from the bottom to the top.
- Slice and Serve: Cut the wrap in half for easy handling and enjoy!
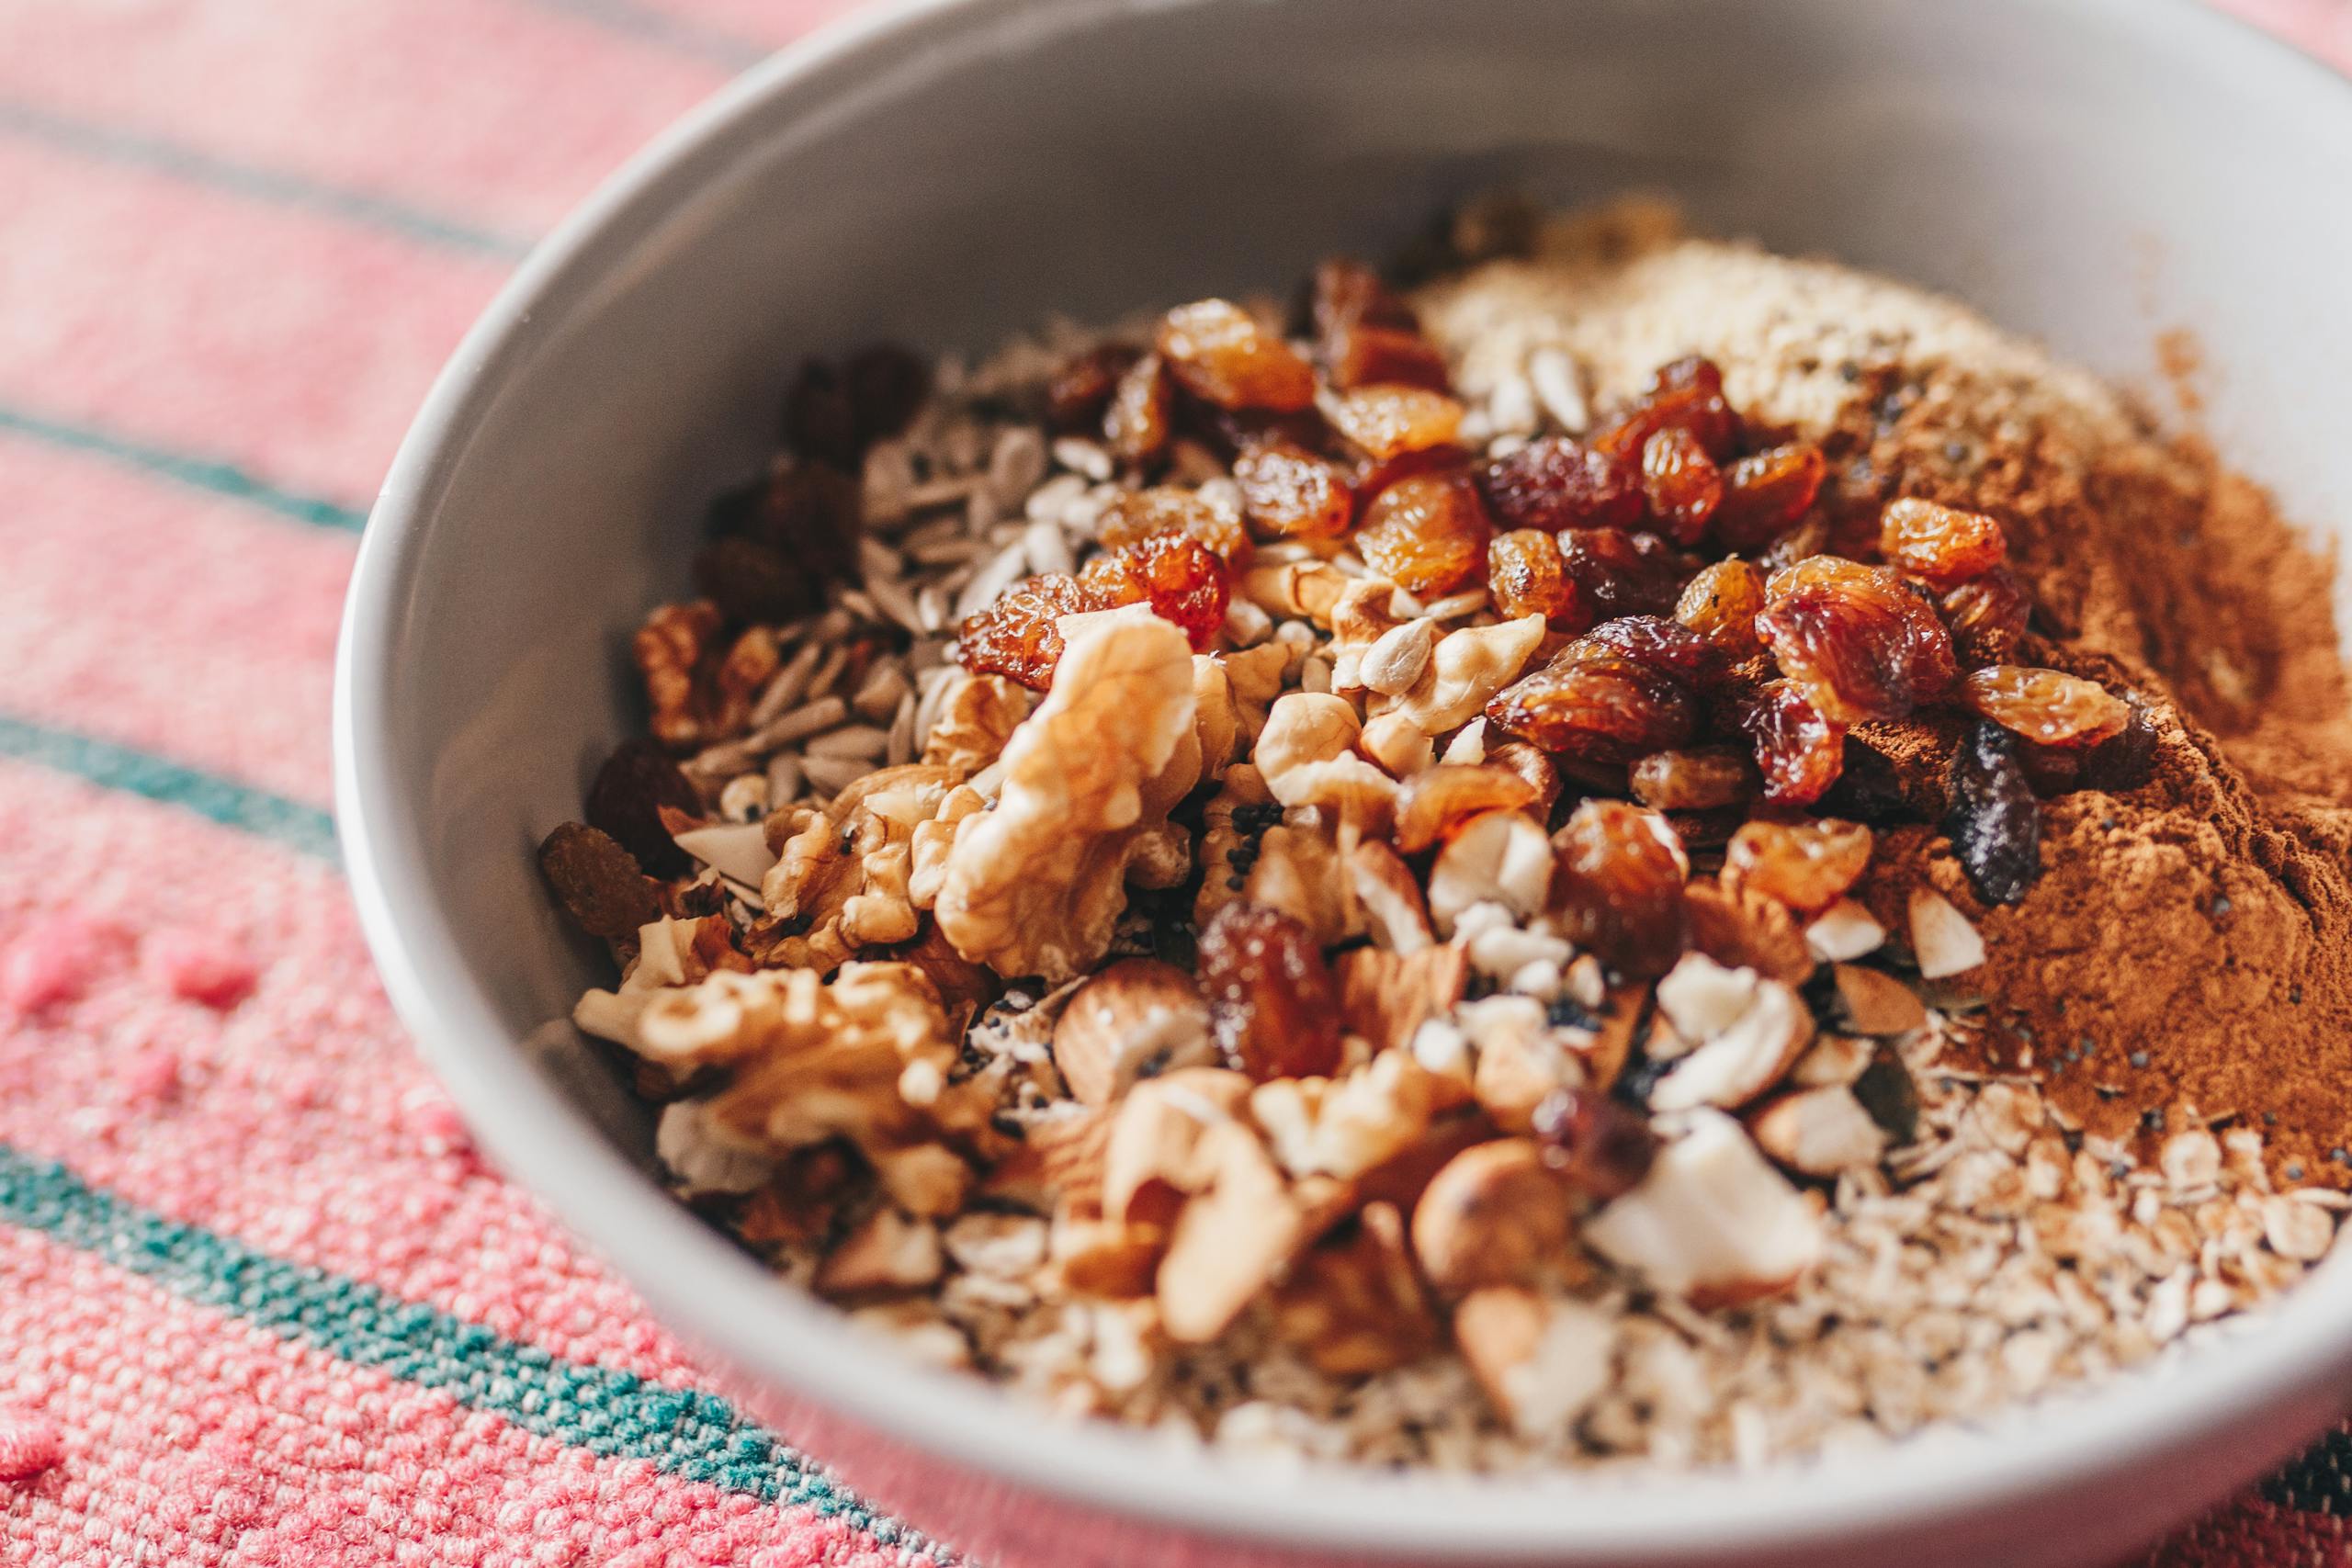
Overnight Oats for a Sweet Touch
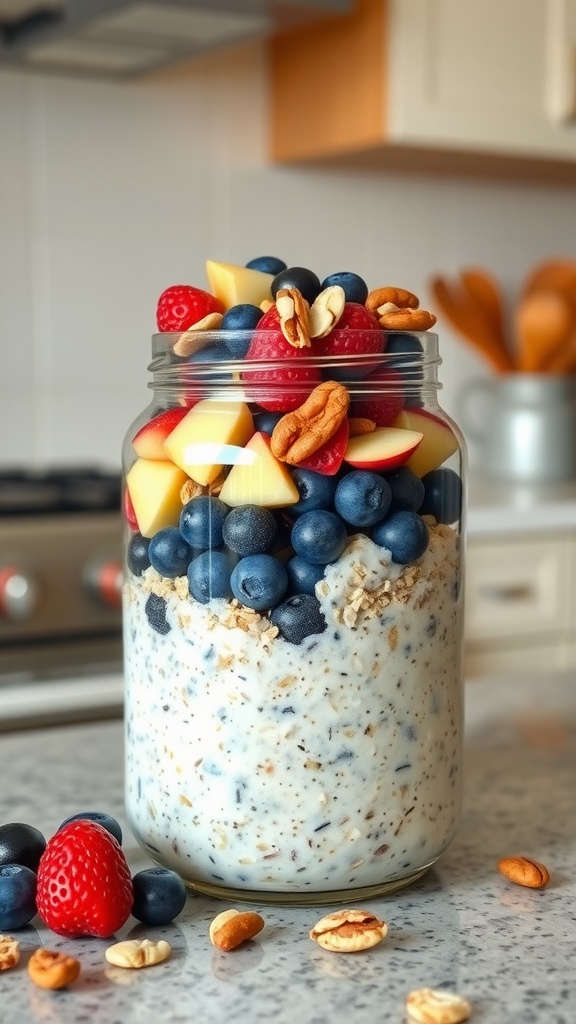
If you’re looking for a quick and tasty lunchbox idea, overnight oats are a fantastic option. This simple recipe combines creamy oats with the sweetness of fresh fruit and nuts, making it a satisfying meal that’s perfect for busy days. Plus, you can customize it with your favorite flavors!
Making overnight oats couldn’t be easier. Just mix rolled oats with your choice of milk or yogurt, add some sweetener if desired, and top it off with colorful fruits and crunchy nuts. After a night in the fridge, you’ll wake up to a delicious breakfast ready to go!
Ingredients
- 1 cup rolled oats
- 1 cup milk (or dairy-free alternative)
- 2 tablespoons honey or maple syrup
- 1/2 teaspoon vanilla extract
- 1/2 cup Greek yogurt (optional)
- 1/2 cup mixed fruits (berries, diced apples, etc.)
- 1/4 cup nuts (almonds, walnuts, pecans)
Instructions
- In a jar or bowl, combine the rolled oats, milk, honey, vanilla extract, and Greek yogurt if using. Stir well to combine.
- Add your choice of fruits on top, followed by the nuts. Feel free to layer as you like!
- Cover and refrigerate overnight (or at least 4 hours) to allow the oats to soften and absorb the flavors.
- The next morning, grab your jar and enjoy your delicious overnight oats!
Mason Jar Salads for Quick Nutrition
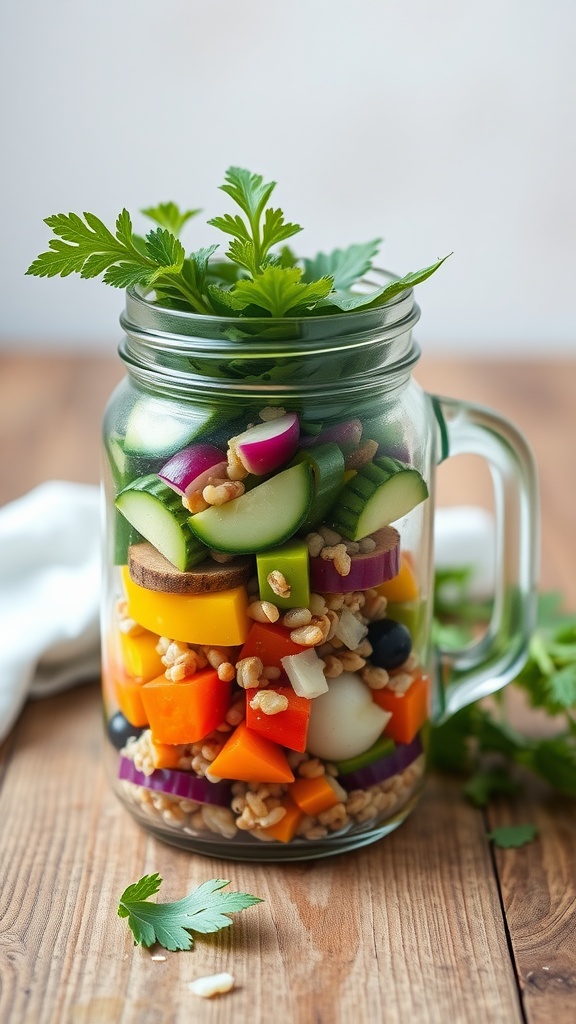
Mason jar salads are a fun and easy way to enjoy a nutritious lunch on the go. They are colorful and packed with fresh vegetables, grains, and proteins, making them a satisfying meal that bursts with flavor. Plus, they are simple to prepare ahead of time, allowing you to grab one from the fridge whenever hunger strikes.
You can mix and match your ingredients based on your taste and dietary needs, creating a jar that’s uniquely yours. The layers help keep the ingredients fresh, and you can shake it all together right before eating, ensuring every bite is just as delicious as the last.
Ingredients
- 1 cup cooked quinoa or brown rice
- 1 cup cherry tomatoes, halved
- 1 cup cucumber, diced
- 1 cup bell peppers, diced (any color)
- 1/2 cup red onion, thinly sliced
- 1 cup shredded carrots
- 1/2 cup black olives, sliced
- 1/4 cup feta cheese (optional)
- 2 tablespoons olive oil
- 1 tablespoon balsamic vinegar
- Salt and pepper to taste
Instructions
- Layer the ingredients in a mason jar starting with the quinoa or brown rice at the bottom to absorb moisture.
- Add the cherry tomatoes, cucumber, bell peppers, red onion, shredded carrots, and olives in that order.
- If using, sprinkle the feta cheese on top.
- In a small bowl, whisk together the olive oil, balsamic vinegar, salt, and pepper. Drizzle over the salad just before serving.
- Secure the lid on the jar and store in the fridge for up to 4 days.
Pre-packed Snack Boxes for Grazing
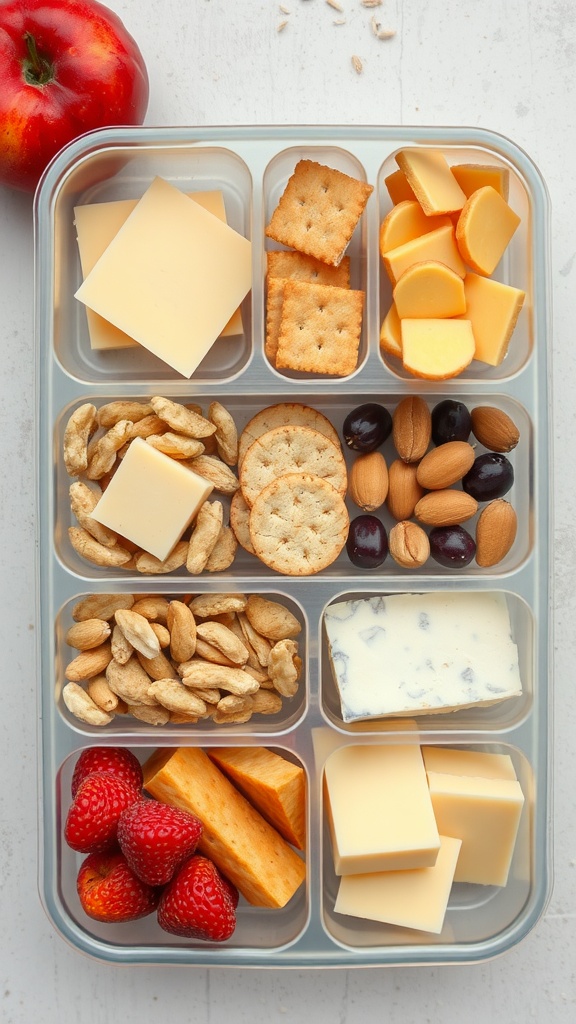
Pre-packed snack boxes are a wonderful way to mix convenience with taste. They offer a variety of textures and flavors, making each bite a little adventure. With a simple assembly process, you can customize these boxes to include your favorite snacks, ensuring they are both nutritious and satisfying.
These boxes can include a delightful mix of cheeses, crackers, fruits, and nuts. The sweetness of strawberries complements the savory crunch of crackers perfectly. It’s a great way to keep energy up throughout the day, and they are easy to pack and serve. Here’s a quick recipe to create your own!
Ingredients
- 1 cup assorted cheese cubes (cheddar, gouda, blue cheese)
- 1 cup whole grain crackers
- 1 cup mixed nuts (almonds, cashews)
- 1/2 cup dried fruits (cranberries, raisins)
- 1 cup fresh strawberries
- 1 medium apple, sliced
- 1/4 cup dark chocolate-covered almonds (optional)
Instructions
- Start by gathering all your ingredients. Make sure your fruits are washed and sliced, and your cheeses are cubed.
- In a large compartment or container, layer the cheese cubes, crackers, and nuts for easy access.
- Add a small section for dried fruits and a few fresh strawberries for a pop of color and flavor.
- If you like, include some dark chocolate-covered almonds for a sweet touch.
- Finish by placing the apple slices in a separate section to keep them fresh.
Quinoa Bowls for Balanced Meals
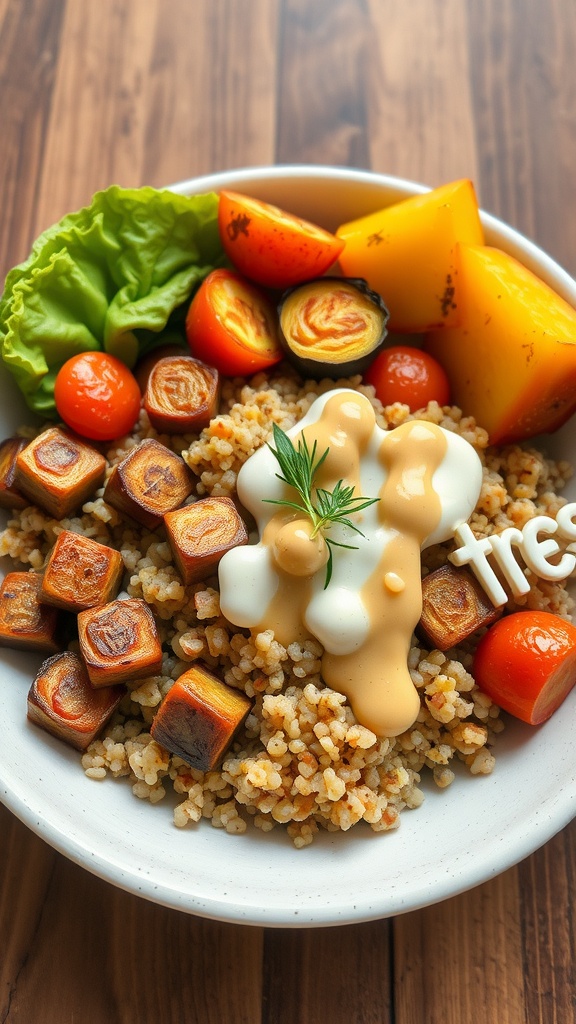
Quinoa bowls are a fantastic option for lunchboxes, offering a mix of flavors and nutrients all in one dish. Packed with protein, fiber, and a variety of colorful veggies, they’re not only healthy but also easy to customize based on your taste preferences or what you have on hand.
These bowls are simple to prepare and can be made ahead of time, making them ideal for busy weekdays. Toss together some cooked quinoa with roasted or fresh vegetables, a protein source like grilled chicken or chickpeas, and a tasty dressing to bring it all together. You can enjoy them warm or cold, which adds to their versatility!
Ingredients
- 1 cup quinoa
- 2 cups vegetable or chicken broth
- 1 cup mixed vegetables (like bell peppers, zucchini, and cherry tomatoes)
- 1 can chickpeas, drained and rinsed
- 1 tablespoon olive oil
- Salt and pepper to taste
- Your favorite dressing (like tahini or vinaigrette)
- Fresh herbs for garnish (like parsley or cilantro)
Instructions
- Cook the Quinoa: Rinse the quinoa under cold water. In a pot, combine quinoa and broth, bring to a boil, then reduce heat to low and simmer for about 15 minutes, or until the liquid is absorbed. Fluff with a fork.
- Prepare the Vegetables: Preheat the oven to 400°F (200°C). Toss the mixed vegetables with olive oil, salt, and pepper. Spread on a baking sheet and roast for 20-25 minutes until tender.
- Combine: In a large bowl, mix the cooked quinoa, roasted vegetables, and chickpeas. Drizzle with your favorite dressing and toss gently to combine.
- Serve: Garnish with fresh herbs and serve warm or allow to cool and pack in lunchboxes for later.
Sushi Rolls Made Easy

Sushi rolls are not only delicious but also super fun to make! They offer a delightful combination of flavors and textures, making them a hit for lunchboxes. With fresh veggies, rice, and seaweed, these rolls are light yet satisfying. Plus, they’re easy to customize according to your taste.
This recipe is a simple way to whip up sushi rolls at home without any fuss. You’ll enjoy the crunchy vegetables paired with creamy avocado and a hint of soy sauce. Perfect for a quick meal on the go, sushi rolls can be made ahead of time, making them a great addition to any lunchbox.
Ingredients
- 2 cups sushi rice
- 2 1/2 cups water
- 1/4 cup rice vinegar
- 2 tablespoons sugar
- 1 teaspoon salt
- 4 sheets of nori (seaweed)
- 1 small cucumber, julienned
- 1 carrot, julienned
- 1 avocado, sliced
- Soy sauce, for serving
Instructions
- Prepare the Sushi Rice: Rinse sushi rice under cold water until the water runs clear. In a pot, combine rice and water. Bring to a boil, then reduce heat to low, cover, and simmer for 20 minutes. Remove from heat and let stand for 10 minutes.
- Season the Rice: In a small bowl, mix rice vinegar, sugar, and salt until dissolved. Gently fold this mixture into the cooked rice, being careful not to mash the grains.
- Assemble the Rolls: Lay a sheet of nori on a bamboo mat. With wet hands, spread a thin layer of rice over the nori, leaving a little space at the top. Layer cucumber, carrot, and avocado on top of the rice.
- Roll: Start rolling the sushi away from you, using the mat to keep it tight. Roll until you reach the edge of the nori, then wet the edge to seal.
- Slice and Serve: Use a sharp knife to slice the roll into bite-sized pieces. Serve with soy sauce for dipping.
Veggie-Packed Pita Pockets
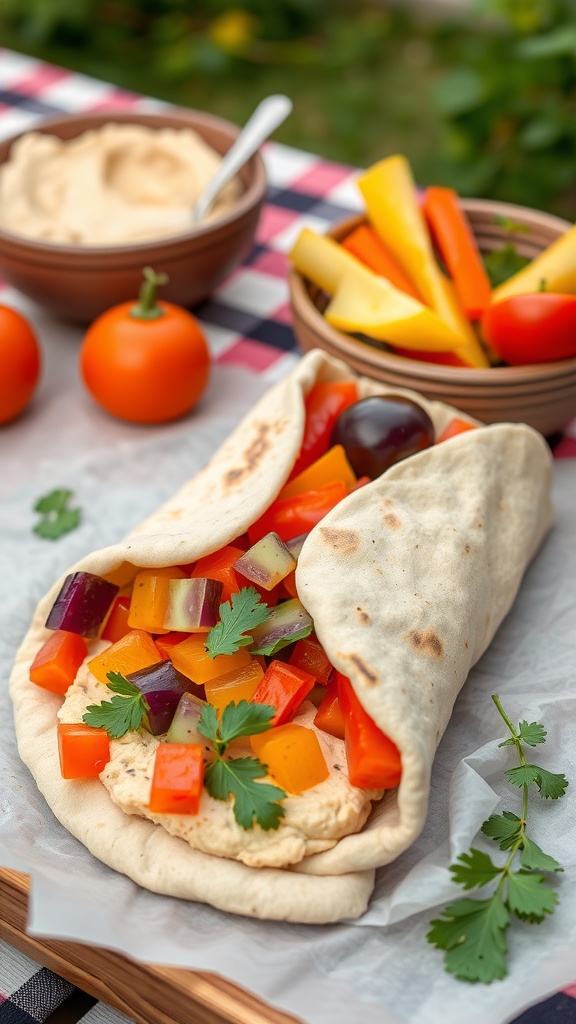
Veggie-packed pita pockets are a fun, healthy, and super easy lunch option that kids and adults will love. Bursting with fresh flavors and vibrant colors, these pockets offer a satisfying crunch with every bite. The combination of crunchy veggies and creamy hummus makes for a delightful taste experience that’s also nutritious.
What’s great about this recipe is its simplicity. Just chop up your favorite vegetables, slather some hummus inside a warm pita, and fill it to your heart’s content! It’s a quick meal you can customize based on what you have on hand, ensuring that lunch never gets boring.
Ingredients
- 4 whole wheat pitas
- 1 cup hummus
- 1 cup diced bell peppers (red, yellow, and green)
- 1 cup diced cucumbers
- 1 cup cherry tomatoes, halved
- 1/2 cup shredded carrots
- 1/4 cup chopped fresh parsley or cilantro
- Salt and pepper to taste
Instructions
- Prepare the Pita: Warm the pitas in a toaster or on a skillet for a few minutes until soft.
- Spread Hummus: Take each pita and generously spread hummus on the inside.
- Add Veggies: Fill each pita with the diced bell peppers, cucumbers, cherry tomatoes, and shredded carrots.
- Season: Sprinkle the chopped parsley or cilantro on top and add salt and pepper to taste.
- Serve: Enjoy your veggie-packed pita pockets immediately, or wrap them up for later!