12 Creative Lunchbox Ideas for Nut-Free Options
Ready to shake up lunch preparation? Here are 12 fun lunchbox ideas that skip the nuts while keeping things tasty and exciting. From colorful wraps to creative dips, these ideas will make lunchtime enjoyable without the worry of allergens. Let’s make lunchtime something to look forward to!
Cucumber Sandwiches with Cream Cheese
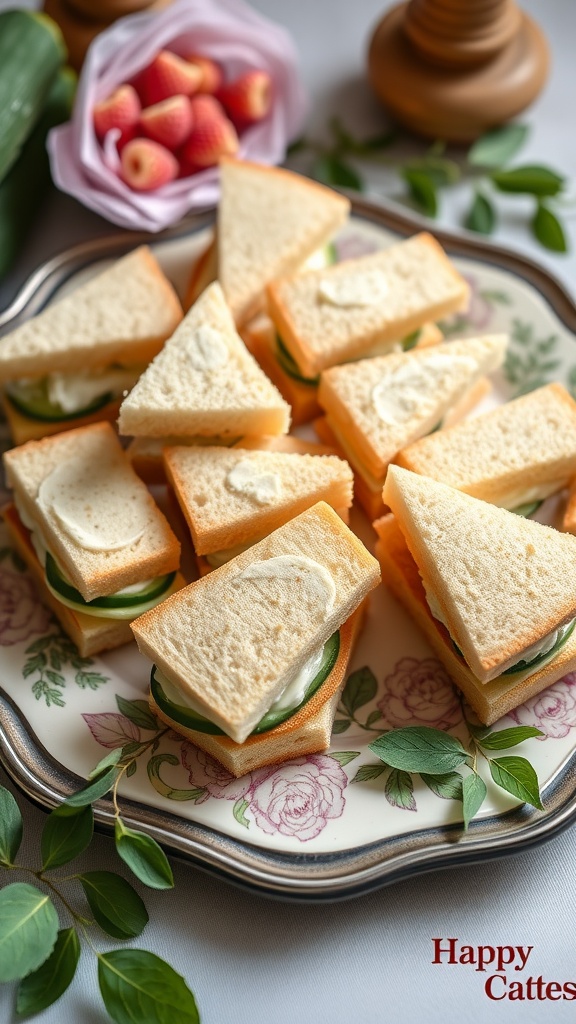
Cucumber sandwiches with cream cheese are a delightful and refreshing lunchbox treat. They offer a crisp texture from the cucumbers and a smooth, creamy flavor from the cheese, making them a perfect light meal. Easy to make and visually appealing, these sandwiches are great for kids and adults alike.
Simply layer thin slices of cucumber between soft bread spread with cream cheese for a quick and nutritious option. They are not only tasty but also a fun way to get some veggies in. Enjoy these sandwiches fresh, or pack them in a lunchbox for a convenient on-the-go bite!
Ingredients
- 8 slices of white or whole grain bread
- 1 cup cream cheese, softened
- 1 large cucumber, thinly sliced
- Salt and pepper to taste
- Fresh dill or chives (optional)
Instructions
- Spread a generous layer of cream cheese on each slice of bread.
- Place a layer of cucumber slices on half of the bread slices. Sprinkle lightly with salt, pepper, and optional herbs.
- Top with the remaining slices of bread to create sandwiches.
- Cut the sandwiches into quarters or triangles for easy handling.
- Serve immediately or store in an airtight container until ready to enjoy.
Cheesy Quesadilla Slices

Cheesy quesadilla slices are a tasty and quick option for lunchboxes that kids will love. With their crispy exterior and gooey cheese filling, these quesadillas bring a delightful combination of textures and flavors. They are super simple to make, requiring just a few ingredients and minimal prep time.
Whether you’re packing them for school or enjoying them at home, these cheesy delights can be paired with salsa or your child’s favorite dipping sauce for added fun. They are versatile too; feel free to add in extra ingredients like veggies or chicken for a boost of flavor!
Ingredients
- 4 medium flour tortillas
- 2 cups shredded cheese (cheddar, mozzarella, or a mix)
- 1 tablespoon olive oil or butter
- Your choice of dips (salsa, sour cream, or ketchup)
Instructions
- Heat the oil or butter in a skillet over medium heat.
- Place one tortilla in the skillet and sprinkle half of the cheese evenly over it. Top with another tortilla.
- Cook for 2-3 minutes until the bottom tortilla is golden brown, then carefully flip and cook the other side for another 2-3 minutes until the cheese is melted.
- Remove from the skillet and let it cool slightly. Cut into wedges.
- Repeat with the remaining tortillas and cheese. Serve with your choice of dips.
Mini Pita Pockets with Hummus
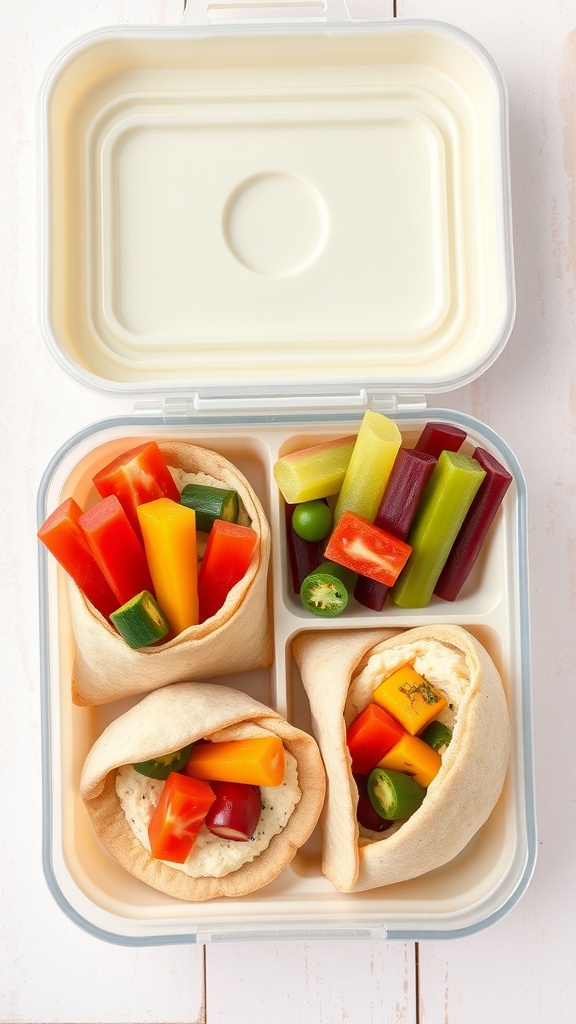
Mini pita pockets filled with hummus and colorful veggies make a fun and tasty lunch option. They are light, creamy, and packed with flavor, making them a hit for both kids and adults. Plus, they’re super easy to prepare, giving you more time to enjoy your meal.
The combination of soft pita bread and smooth hummus pairs perfectly with crunchy vegetables. You can customize the fillings based on what you have on hand, making it a versatile option for any lunchbox.
Fruit and Yogurt Parfait
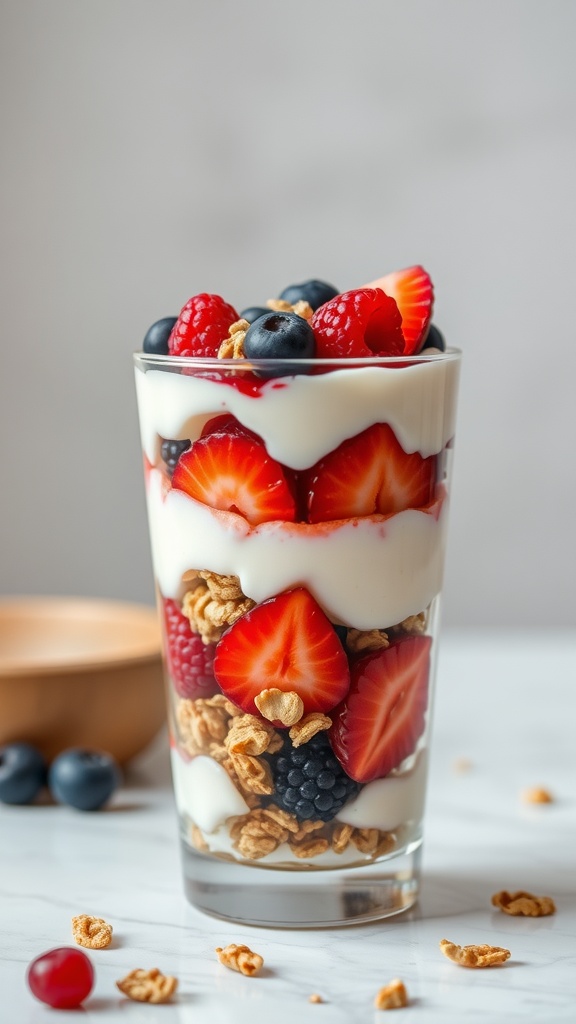
A fruit and yogurt parfait is a delightful and nutritious option for lunchboxes. It’s light yet satisfying, offering a perfect balance of creamy yogurt, fresh fruits, and a crunchy element like granola. This recipe is simple to make and can be customized with your favorite fruits, making it a versatile choice for everyone.
The taste is refreshing and sweet, with the tanginess of yogurt complementing the juicy fruits. Kids and adults alike will enjoy this treat, and it’s a great way to sneak in some healthy ingredients. Plus, it’s quick to prepare, ideal for busy mornings!
Ingredients
- 2 cups of yogurt (plain or flavored)
- 1 cup of granola
- 1 cup mixed berries (strawberries, blueberries, raspberries)
- 1 banana, sliced
- 1 tablespoon honey or maple syrup (optional)
Instructions
- In a glass or bowl, start by adding a layer of yogurt at the bottom.
- Next, add a layer of granola over the yogurt.
- Then, layer in your mixed berries and banana slices.
- Repeat the layers until all ingredients are used, finishing with a layer of yogurt on top.
- Drizzle honey or maple syrup on the top layer if desired, and enjoy!
Colorful Veggie Wraps
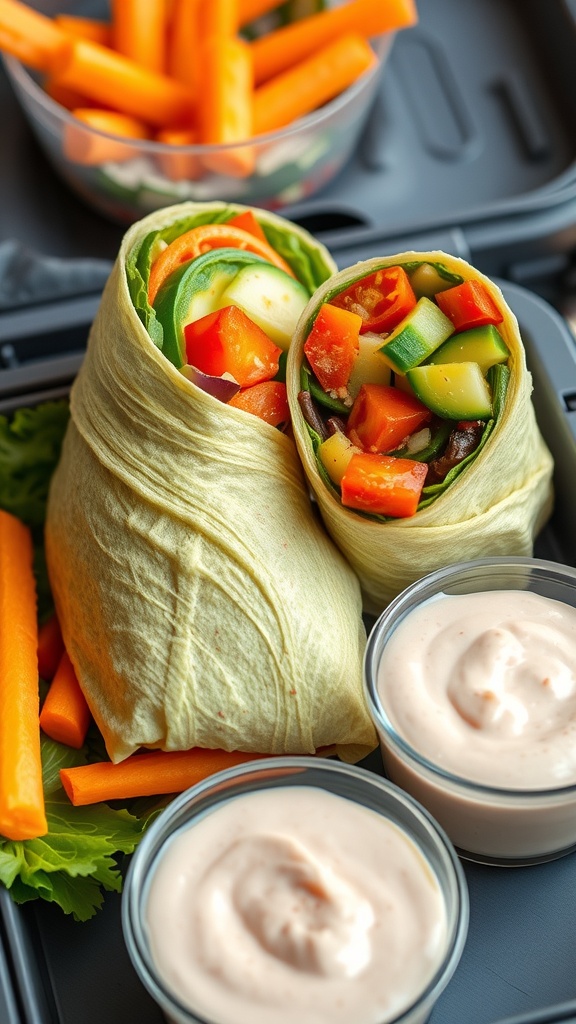
These Colorful Veggie Wraps are a delicious and healthy option for lunch. Packed with fresh vegetables and vibrant flavors, they’re not only simple to make but also fun to eat! The combination of crunchy cucumbers, sweet bell peppers, and crisp carrots provides a satisfying texture that keeps lunchtime interesting.
These wraps are versatile and can easily be customized to suit your taste. Whether you prefer a zesty sauce or a sprinkle of your favorite herbs, there’s plenty of room for creativity. Perfect for lunchboxes or as a quick snack, these veggie wraps are sure to brighten up your day!
Ingredients
- 4 large tortillas (whole wheat or spinach)
- 1 cup cucumbers, diced
- 1 cup bell peppers (red, yellow, green), sliced
- 1 cup carrots, grated or julienned
- 1/2 cup red onion, thinly sliced
- 1/2 cup fresh cilantro, chopped
- 1/4 cup hummus or cream cheese
- Salt and pepper to taste
Instructions
- Spread a layer of hummus or cream cheese over each tortilla.
- Layer the diced cucumbers, sliced bell peppers, grated carrots, and sliced red onion evenly over the tortillas.
- Sprinkle fresh cilantro on top and season with salt and pepper.
- Roll up each tortilla tightly, folding in the sides as you go to secure the filling.
- Slice each wrap in half and serve immediately, or wrap in foil or parchment for lunchboxes.
Savory Rice Balls

Savory rice balls are a delightful and satisfying option for lunchboxes. These tasty bites combine sticky rice with flavorful fillings, creating a portable meal that kids and adults alike will enjoy. They are easy to make and can be customized with various ingredients, making them perfect for any palate.
The rice balls are often filled with veggies, meats, or even cheese, offering a nice contrast of textures and flavors. They can be served with a dipping sauce for added zest, making them not just a meal but also a fun and interactive eating experience.
Ingredients
- 2 cups sushi rice
- 2 1/2 cups water
- 1/4 teaspoon salt
- 1/2 cup cooked and finely chopped vegetables (like carrots, peas, or spinach)
- 1/2 cup cooked and shredded chicken or tofu (optional)
- 1 tablespoon soy sauce
- Green onions for garnish
Instructions
- Rinse the sushi rice in cold water until the water runs clear. Combine the rice, water, and salt in a pot and bring to a boil. Once boiling, reduce heat to low, cover, and simmer for about 20 minutes.
- After the rice is cooked, let it sit covered for an additional 10 minutes. Fluff the rice with a fork and allow it to cool slightly.
- In a bowl, mix the cooled rice with the chopped vegetables, shredded chicken or tofu (if using), and soy sauce.
- Wet your hands and take a handful of the rice mixture. Shape it into a ball, about the size of a golf ball. Repeat with the remaining mixture.
- Place the rice balls on a serving plate and garnish with chopped green onions. Serve immediately or pack in lunchboxes.
Vegetable Sushi Rolls
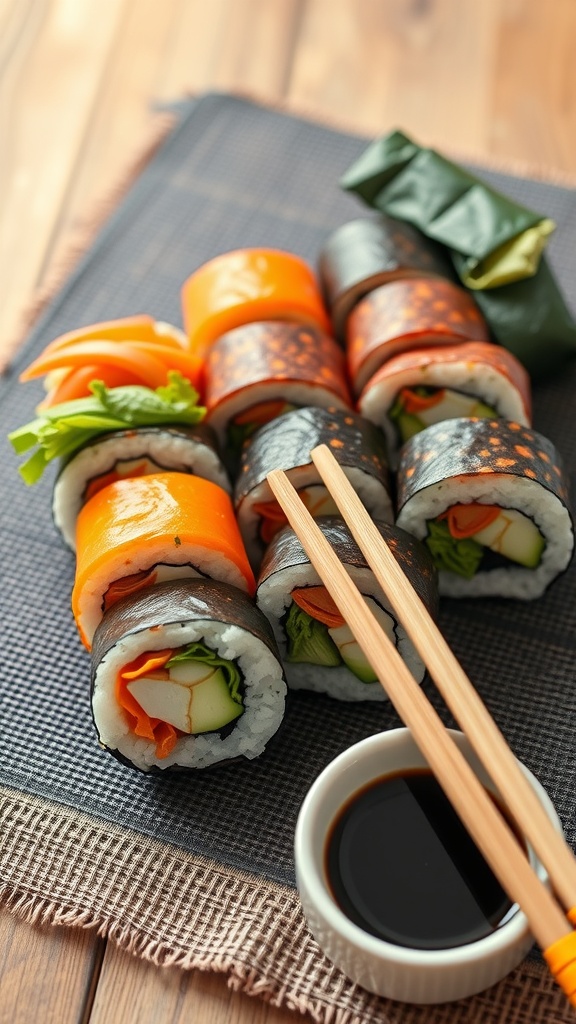
Vegetable sushi rolls are a delicious and healthy option for lunchboxes, bringing a fresh and vibrant taste to the table. They’re simple to make and can be customized with a variety of colorful veggies, making them appealing to both kids and adults. The combination of crunchy vegetables and soft rice wrapped in nori creates a satisfying texture that is sure to please.
These rolls are not only visually appealing but also packed with nutrients. You can experiment with different ingredients such as cucumbers, carrots, and bell peppers to find the perfect combination. Plus, they can be prepared ahead of time and enjoyed cold, making them a convenient choice for any lunch.
Ingredients
- 2 cups sushi rice
- 2 1/2 cups water
- 1/4 cup rice vinegar
- 1 tablespoon sugar
- 1 teaspoon salt
- 4 sheets of nori
- 1 cucumber, julienned
- 1 carrot, julienned
- 1 bell pepper, thinly sliced
- 1 avocado, sliced
- Soy sauce, for serving
Instructions
- Prepare the Sushi Rice: Rinse the sushi rice in cold water until the water runs clear. Combine the rice and water in a pot, bring to a boil, then reduce to low heat, cover, and simmer for about 18 minutes. Remove from heat and let it sit for another 10 minutes.
- Season the Rice: In a small bowl, mix rice vinegar, sugar, and salt until dissolved. Gently fold this mixture into the cooked rice, being careful not to mash it.
- Assemble the Rolls: Place a sheet of nori on a bamboo mat or clean surface. Wet your hands to prevent sticking, and spread a thin layer of rice over the nori, leaving about 1 inch at the top. Lay a few strips of cucumber, carrot, bell pepper, and avocado along the bottom.
- Roll It Up: Starting from the bottom, roll the nori over the filling tightly, using the mat to help keep it tight. Seal the edge of the nori with a bit of water.
- Slice and Serve: Using a sharp knife, cut the roll into bite-sized pieces. Serve with soy sauce for dipping and enjoy!
Turkey and Cheese Roll-Ups
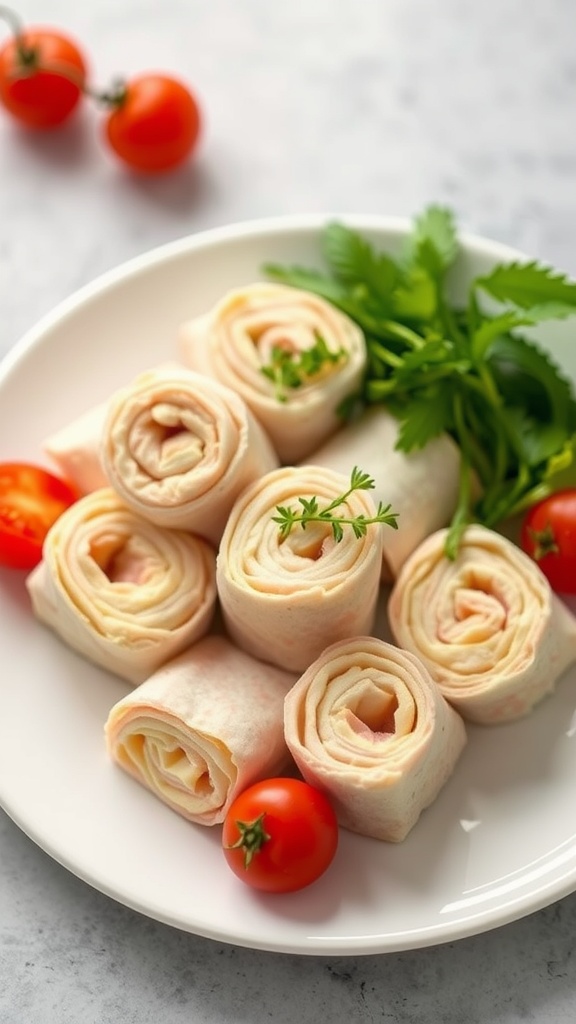
Turkey and cheese roll-ups are a fun and easy lunch option that kids love. They are packed with flavor and can be made in just a few minutes, making them perfect for busy mornings. These delightful bites are a great way to include protein and dairy in your child’s lunchbox without the worry of nuts.
Each roll-up features savory turkey layered with creamy cheese, all wrapped in a soft tortilla. You can add your favorite spreads or veggies for an extra twist. They are simple to customize, so feel free to get creative!
Ingredients
- 4 large tortillas
- 8 slices of turkey
- 4 slices of cheese (cheddar or Swiss work well)
- 2 tablespoons of cream cheese or hummus (optional)
- Sliced cucumbers or bell peppers (optional)
Instructions
- Lay a tortilla flat on a clean surface. Spread a thin layer of cream cheese or hummus across the tortilla, if using.
- Arrange 2 slices of turkey on top of the tortilla, followed by a slice of cheese.
- If you’d like to add veggies, place some sliced cucumbers or bell peppers on top.
- Starting from one end, tightly roll the tortilla until you reach the other end. Slice the roll into bite-sized pieces.
- Repeat with the remaining tortillas and ingredients. Pack in a lunchbox with some cherry tomatoes or carrot sticks for a complete meal!
Baked Chicken Nuggets

Baked chicken nuggets are a fun and tasty option for lunchboxes that kids and adults alike will love. These nuggets are juicy, crispy, and full of flavor, making them a delicious addition to any meal or snack time. They are simple to make and can be prepared in just a few steps, ensuring that you spend less time in the kitchen and more time enjoying your meal.
These nuggets are perfect for dipping in your favorite sauces, from classic ketchup to zesty barbecue. Not only are they a great source of protein, but they are also nut-free, making them a safe choice for those with allergies. Next time you’re packing lunch, these baked chicken nuggets will surely be a hit!
Ingredients
- 1 pound ground chicken
- 1/2 cup breadcrumbs
- 1/4 cup grated Parmesan cheese
- 1 teaspoon garlic powder
- 1 teaspoon onion powder
- 1 teaspoon paprika
- 1/2 teaspoon salt
- 1/4 teaspoon black pepper
- 1 egg, beaten
- Cooking spray
Instructions
- Preheat your oven to 400°F (200°C) and line a baking sheet with parchment paper.
- In a large bowl, combine ground chicken, breadcrumbs, Parmesan cheese, garlic powder, onion powder, paprika, salt, pepper, and beaten egg. Mix until well combined.
- Using your hands, form the mixture into small nugget shapes and place them on the prepared baking sheet.
- Lightly spray the nuggets with cooking spray to help them crisp up in the oven.
- Bake for 15-20 minutes, or until golden brown and cooked through, flipping halfway through the cooking time.
Oven-Baked Sweet Potato Fries
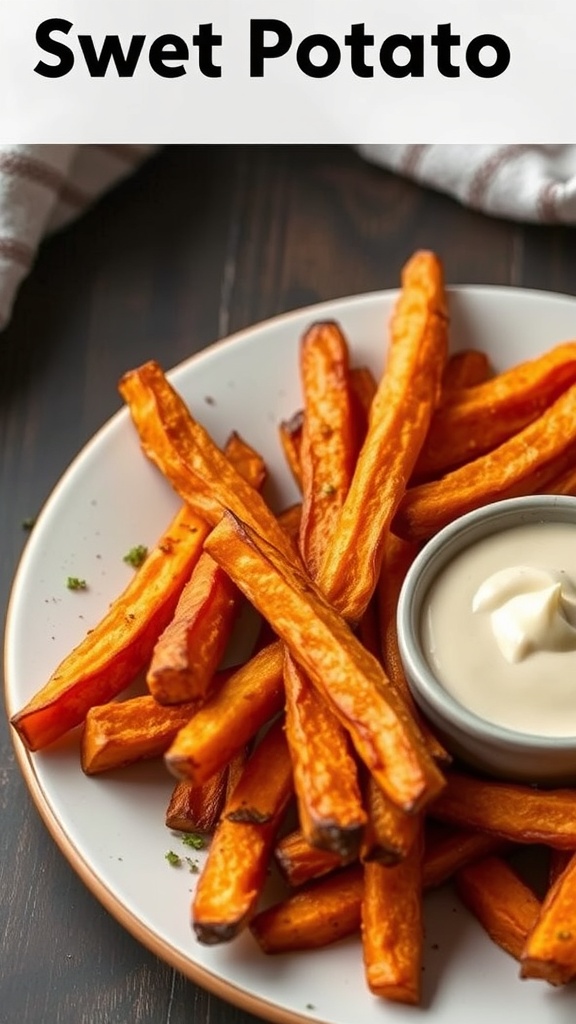
Oven-baked sweet potato fries are a tasty and healthy alternative to regular fries. They are crispy on the outside and soft on the inside, offering a delightful sweetness that pairs well with various dips. Plus, they are super easy to make, making them a perfect addition to any lunchbox!
These fries can be seasoned to your liking, whether you prefer a simple sprinkle of salt or a mix of spices for a little kick. They cook up quickly in the oven, and the whole family will love them!
Ingredients
- 2 large sweet potatoes
- 2 tablespoons olive oil
- 1 teaspoon paprika
- 1 teaspoon garlic powder
- 1/2 teaspoon salt
- 1/2 teaspoon black pepper
- Optional: your favorite dipping sauce
Instructions
- Preheat your oven to 425°F (220°C) and line a baking sheet with parchment paper.
- Peel the sweet potatoes and cut them into fry-shaped pieces, about 1/4 inch thick.
- In a large bowl, toss the sweet potato fries with olive oil, paprika, garlic powder, salt, and pepper until evenly coated.
- Spread the fries in a single layer on the prepared baking sheet, making sure they aren’t overcrowded.
- Bake for 25-30 minutes, flipping halfway through, until the fries are golden brown and crispy.
- Serve warm with your favorite dipping sauce.
Hard-Boiled Eggs with Spices

Hard-boiled eggs are a classic choice for lunchboxes, offering a protein-packed option that’s both satisfying and easy to prepare. With just a little bit of spice, they can be transformed into a flavorful snack that keeps things interesting. The creamy yolk combined with some seasoning gives your taste buds a delightful treat.
Making these spiced hard-boiled eggs is simple and quick. You only need a few ingredients, and they can be prepared ahead of time, making them perfect for busy days. Whether you prefer a hint of paprika or a dash of pepper, these eggs will bring a kick to your lunch.
Ingredients
- 6 large eggs
- 1 teaspoon paprika
- 1/2 teaspoon salt
- 1/4 teaspoon black pepper
- 1 tablespoon olive oil or mayonnaise (optional)
- Fresh herbs for garnish (optional)
Instructions
- Boil the Eggs: Place the eggs in a pot and cover them with cold water. Bring the water to a boil, then cover the pot and remove it from the heat. Let the eggs sit for about 12 minutes.
- Cool the Eggs: After 12 minutes, transfer the eggs to a bowl of ice water to cool completely. This will make peeling easier.
- Peel and Cut: Once cool, gently tap the eggs on a hard surface and peel away the shells. Cut the eggs in half lengthwise.
- Season the Egg Yolks: In a small bowl, mix the yolks with paprika, salt, and black pepper. You can add olive oil or mayonnaise for a creamier texture if desired.
- Fill the Egg Whites: Spoon the seasoned yolk mixture back into the egg whites. Garnish with fresh herbs if you like.
- Pack and Enjoy: Place the finished eggs in a lunchbox, and they are ready to go!
Pasta Salad with Fresh Vegetables
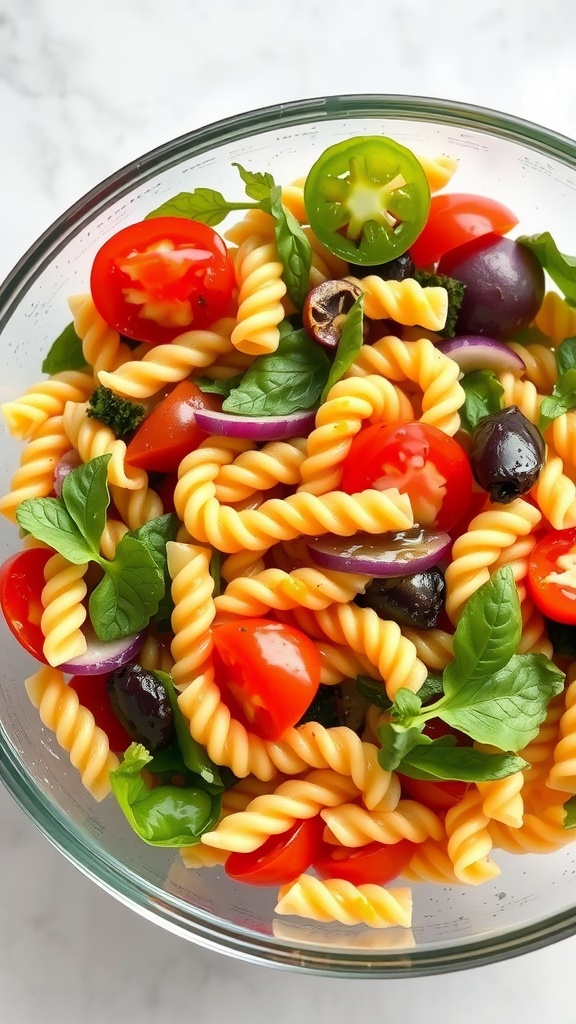
This pasta salad is a delightful mix of colorful vegetables and tender pasta, making it a tasty and nutritious option for lunchboxes. The freshness of the ingredients adds a crunch that perfectly complements the soft pasta, resulting in a dish that’s not only refreshing but also satisfying.
Preparing this salad is a breeze, ensuring you can whip it up quickly for busy days. It’s packed with flavor and can easily be customized to suit your taste. Plus, it’s nut-free, making it a great choice for those with nut allergies!
Ingredients
- 8 oz rotini pasta
- 1 cup cherry tomatoes, halved
- 1 cup cucumber, diced
- 1/2 cup black olives, sliced
- 1/2 cup bell pepper, chopped
- 1/4 red onion, thinly sliced
- 1 cup fresh spinach or basil leaves
- 1/4 cup olive oil
- 2 tablespoons red wine vinegar
- 1 teaspoon oregano
- Salt and pepper to taste
Instructions
- Cook the Pasta: Bring a pot of salted water to a boil. Add the rotini pasta and cook according to package instructions until al dente. Drain and rinse under cold water to stop the cooking process.
- Prepare the Vegetables: While the pasta is cooling, chop the cherry tomatoes, cucumber, olives, bell pepper, and red onion. Add them to a large mixing bowl.
- Combine Ingredients: Once the pasta is cool, add it to the bowl with the chopped vegetables. Toss in the spinach or basil leaves.
- Make the Dressing: In a small bowl, whisk together the olive oil, red wine vinegar, oregano, salt, and pepper.
- Mix and Serve: Pour the dressing over the pasta salad and toss everything together until well coated. Adjust seasoning if needed. Serve immediately or store in the refrigerator for later.