8 Creative Lunchbox Ideas for Quick and Easy Meals
Finding fresh lunch ideas that keep things fun and interesting can be a real challenge, especially on busy mornings. Say goodbye to plain sandwiches and repetitive meals with these 8 creative lunchbox ideas that are not only quick to prepare but also a hit with kids and adults alike. Get ready to impress everyone at the lunch table!
DIY Taco Kit with All the Fixings
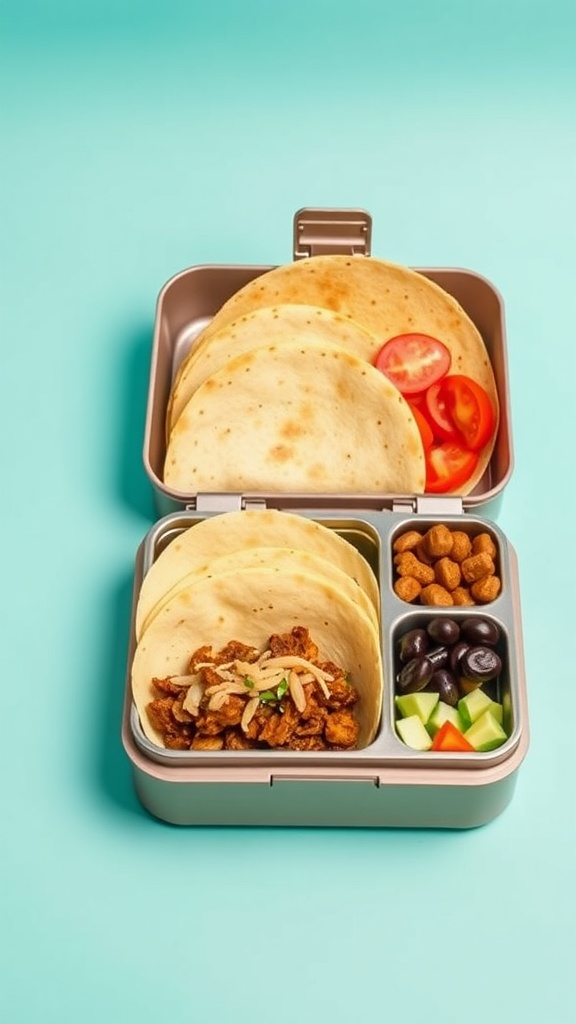
Creating your own DIY taco kit is a fun and easy way to enjoy a delicious lunch. It’s customizable, allowing you to mix and match your favorite toppings and flavors. Each bite bursts with freshness, making it a satisfying option for both kids and adults.
This recipe is not only simple but also encourages creativity. You can prepare the components ahead of time and pack them in a lunchbox for a quick meal on the go. Whether you prefer spicy salsa, crunchy veggies, or creamy guacamole, this taco kit has something for everyone!
Ingredients
- 8 small tortillas
- 1 pound cooked chicken or beef, shredded
- 1 cup shredded cheese
- 1 cup chopped lettuce
- 1 medium tomato, diced
- 1/2 cup sour cream
- 1/4 cup salsa
- 1/4 cup chopped onions
- 1/4 cup sliced olives
- 1/4 cup chopped cilantro (optional)
Instructions
- Prepare the Protein: If using chicken or beef, season and cook until tender. Shred and set aside.
- Chop the Veggies: Dice tomatoes, chop lettuce, and slice onions and olives. Keep them fresh by storing in separate containers.
- Assemble the Kit: Pack the tortillas, shredded protein, cheese, veggies, sour cream, and salsa in your lunchbox.
- Enjoy: When ready to eat, fill a tortilla with your desired toppings and enjoy your homemade taco!
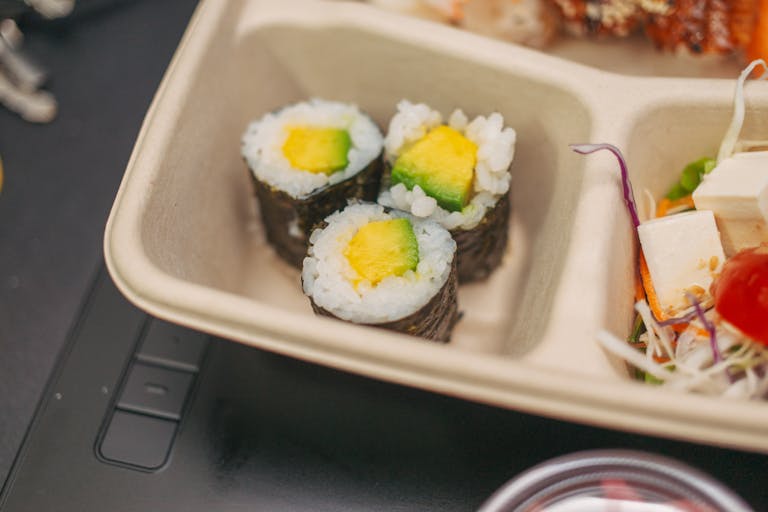
Chicken and Avocado Sushi Rolls

Chicken and avocado sushi rolls offer a delightful twist on traditional sushi. They’re packed with flavor and provide a satisfying bite, making them perfect for a quick lunch or snack. The creamy texture of the avocado complements the succulent chicken, resulting in a delicious combination that’s easy to make.
This recipe is simple enough for beginners and can be customized with your favorite ingredients. Plus, it’s a fun way to enjoy sushi without needing a restaurant. You can prep these rolls in advance, making lunchtime a breeze!
Ingredients
- 2 cups sushi rice
- 2 cups water
- 1/4 cup rice vinegar
- 1 tablespoon sugar
- 1/2 teaspoon salt
- 4 sheets nori (seaweed)
- 1 cup cooked chicken, shredded
- 1 ripe avocado, sliced
- Soy sauce, for serving
Instructions
- Prepare the Sushi Rice: Rinse sushi rice under cold water until the water runs clear. In a saucepan, combine the rice and water, bring to a boil, then reduce heat and cover. Simmer for about 20 minutes until cooked. Remove from heat and let it sit, covered, for another 10 minutes.
- Season the Rice: In a small bowl, mix rice vinegar, sugar, and salt until dissolved. Gently fold this mixture into the warm rice, taking care not to mash it.
- Assemble the Rolls: Place a sheet of nori on a bamboo mat or clean surface. With wet hands, spread a thin layer of sushi rice over the nori, leaving a small border at the top. Lay down slices of chicken and avocado in the center.
- Roll the Sushi: Starting from the bottom, carefully roll the nori away from you, pressing gently but firmly to keep it tight. Use a little water to seal the edge of the nori.
- Slice and Serve: With a sharp knife, slice the roll into bite-sized pieces. Serve with soy sauce for dipping.
Savory Muffins with Cheese and Spinach
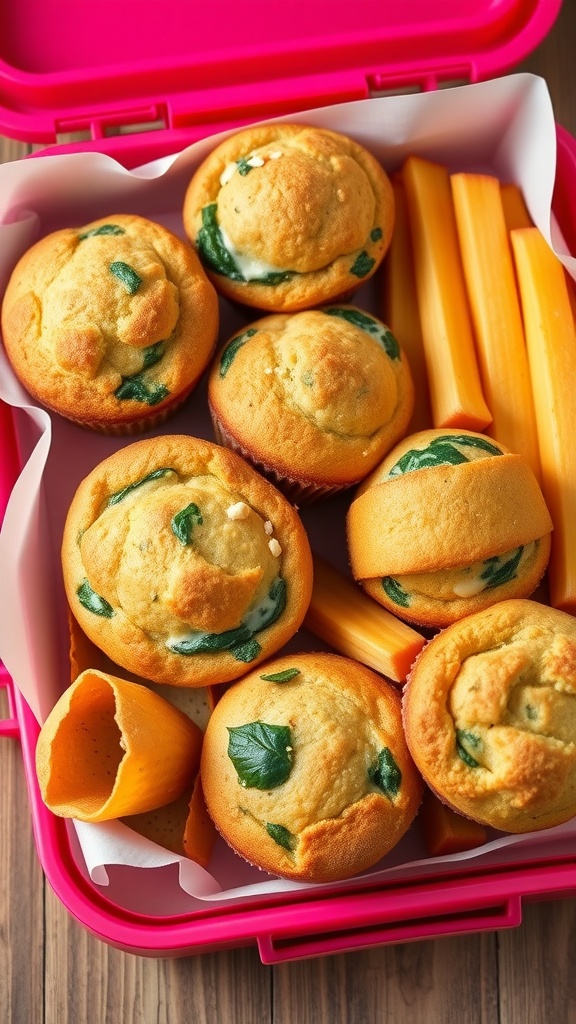
These savory muffins are a delicious and nutritious choice for lunchboxes. Bursting with the goodness of spinach and the richness of cheese, they make for a satisfying meal that’s easy to prepare. The combination of flavors creates a delightful taste that can be enjoyed warm or at room temperature, making them perfect for on-the-go lunches.
Making these muffins is a breeze! With simple ingredients and straightforward steps, you can whip them up quickly. They’re not only tasty but also a great way to sneak in some veggies for the little ones—and even for adults. Enjoy these fluffy muffins as a snack, or pair them with your favorite dipping sauce for a fuller meal.
Ingredients
- 1 cup all-purpose flour
- 1/2 cup cornmeal
- 1 tablespoon baking powder
- 1/2 teaspoon salt
- 1 cup milk
- 1/3 cup vegetable oil
- 2 large eggs
- 1 cup fresh spinach, chopped
- 1 cup shredded cheese (cheddar or your choice)
Instructions
- Preheat your oven to 375°F (190°C) and grease a muffin tin or line it with paper liners.
- In a large bowl, mix together flour, cornmeal, baking powder, and salt.
- In another bowl, whisk together milk, vegetable oil, and eggs until combined.
- Slowly pour the wet ingredients into the dry ingredients, stirring until just combined. Be careful not to overmix.
- Fold in the chopped spinach and shredded cheese until evenly distributed.
- Spoon the batter into the prepared muffin tin, filling each cup about 2/3 full.
- Bake for 18-20 minutes, or until the muffins are golden and a toothpick inserted in the center comes out clean.
- Let them cool for a few minutes before transferring to a wire rack. Enjoy warm or store in an airtight container for later!
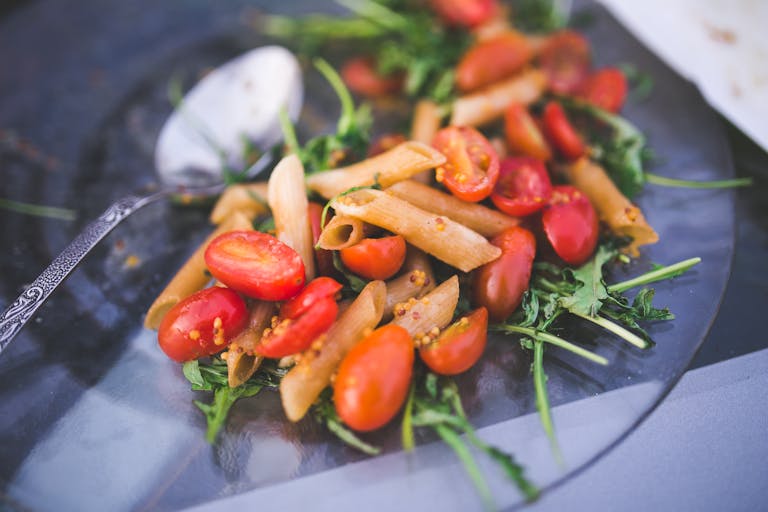
Quinoa Salad with Seasonal Veggies
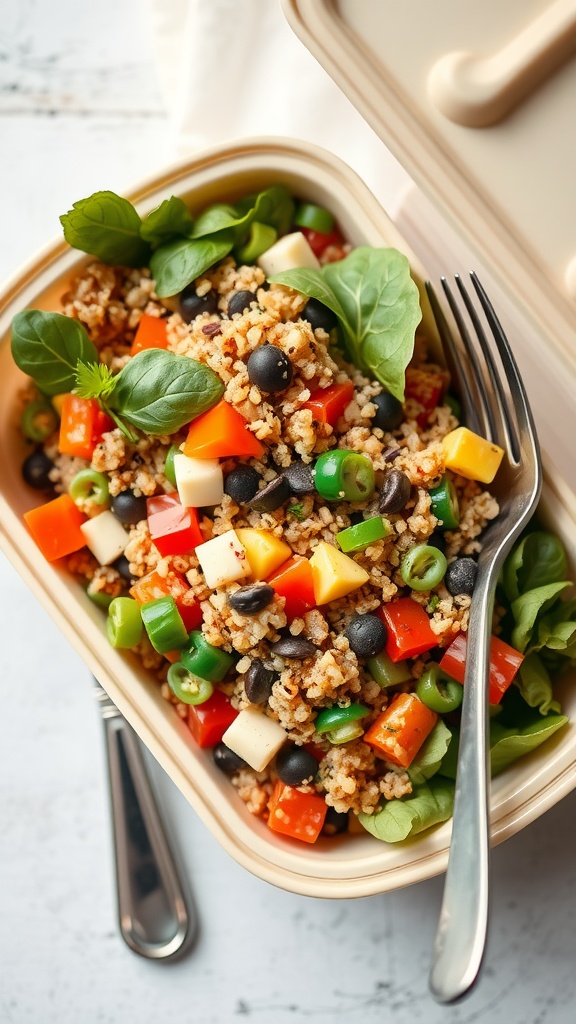
This quinoa salad is a colorful and nutritious option that combines fresh seasonal veggies for a delicious lunch. It’s light yet filling, making it perfect for a midday pick-me-up. With a mix of crunchy vegetables and chewy quinoa, every bite is a treat.
Not only is this salad easy to prepare, but it also allows for customization based on your favorite ingredients. Toss in some herbs for added flavor, and you’ve got a meal that’s both tasty and visually appealing!
Ingredients
- 1 cup quinoa
- 2 cups water
- 1 red bell pepper, diced
- 1 yellow bell pepper, diced
- 1 cucumber, diced
- 1 cup black beans, drained and rinsed
- 1 cup corn (fresh or frozen)
- 1/2 cup green onions, sliced
- 1/4 cup fresh cilantro, chopped
- 1/4 cup olive oil
- 2 tablespoons lime juice
- Salt and pepper to taste
Instructions
- Cook the Quinoa: Rinse the quinoa under cold water. In a saucepan, combine quinoa and water. Bring to a boil, then reduce heat to low and cover. Simmer for about 15 minutes or until water is absorbed. Fluff with a fork and let cool.
- Prepare the Veggies: While the quinoa cooks, chop the bell peppers, cucumber, and green onions. In a large bowl, combine the veggies, black beans, corn, and cilantro.
- Make the Dressing: In a small bowl, whisk together olive oil, lime juice, salt, and pepper.
- Combine: Once the quinoa is cool, add it to the veggie mixture. Pour the dressing over everything and toss gently to combine.
- Serve: Enjoy immediately or store in the fridge for later. This salad tastes even better after marinating for a few hours!
Caprese Skewers with Balsamic Glaze
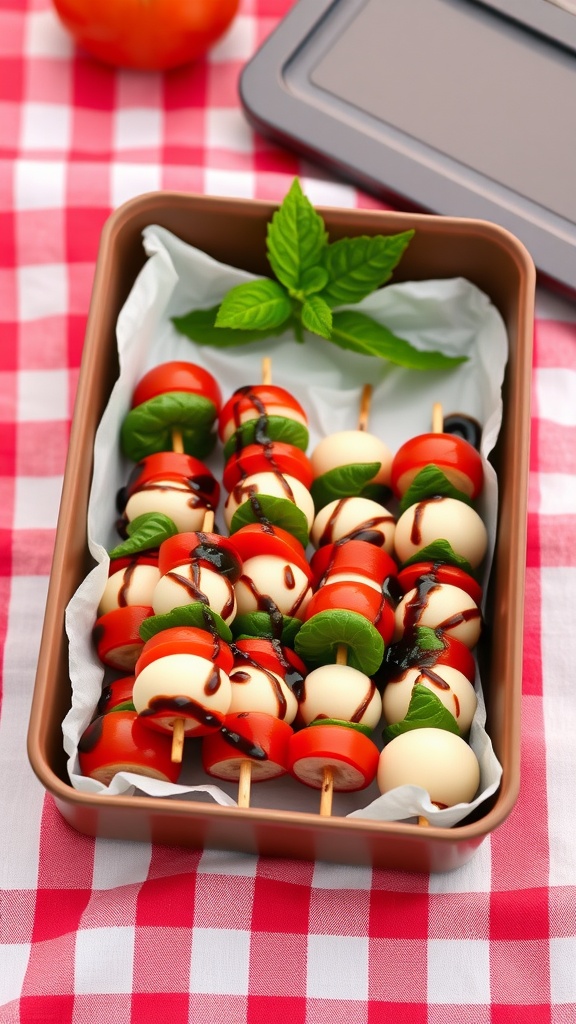
Caprese skewers are a fresh and delightful take on the classic Italian salad. Bursting with the flavors of ripe tomatoes, creamy mozzarella, and fragrant basil, these bites are not only visually appealing but also incredibly tasty. The drizzle of balsamic glaze adds a sweet tang that elevates the dish, making it perfect for a quick lunch or snack.
Making these skewers is a breeze. Simply thread the ingredients onto skewers, and you’re ready to go! They are great for meal prep, as they can be made in advance and stored in the fridge. These skewers are light yet satisfying, making them a go-to option for a busy day.
Ingredients
- 1 pint cherry tomatoes
- 1 pound fresh mozzarella balls
- 1 cup fresh basil leaves
- Balsamic glaze for drizzling
- Salt and pepper to taste
- Skewers
Instructions
- Prepare the Skewers: Take a skewer and start by threading a cherry tomato onto it.
- Add Mozzarella: Follow the tomato with a mozzarella ball, then a basil leaf, and repeat the process until the skewer is filled, leaving some space at the end.
- Season: Once the skewers are assembled, drizzle them with balsamic glaze and sprinkle with salt and pepper.
- Serve: Enjoy these fresh skewers immediately, or refrigerate them for later. They’re perfect for lunchboxes or as a party appetizer!
Mini Pita Pockets with Hummus and Veggies
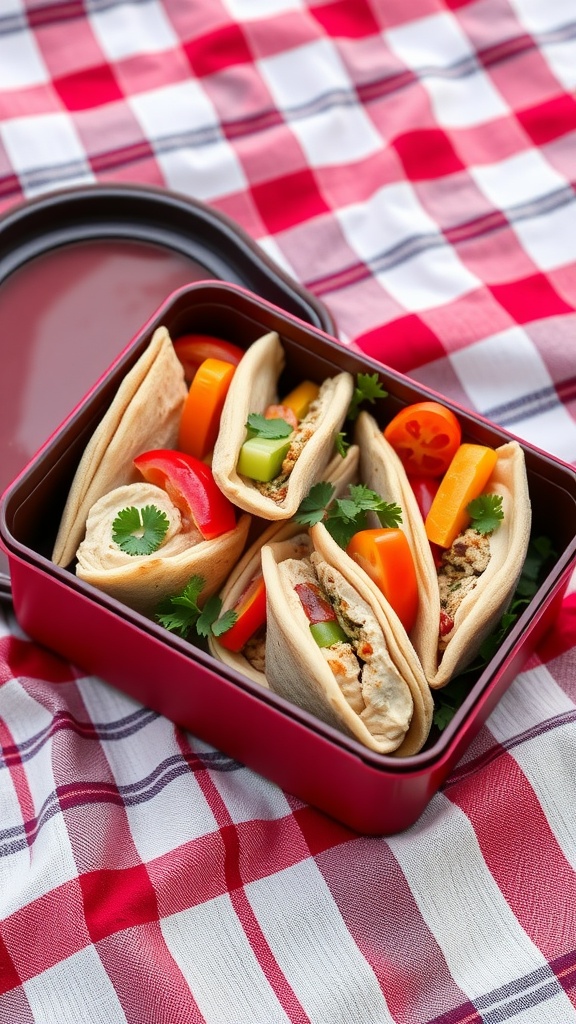
Mini pita pockets filled with hummus and fresh veggies make for a tasty and healthy lunch option. They are simple to prepare and offer a delightful crunch from the veggies mixed with the creamy texture of hummus. Perfect for packing in lunchboxes, these pockets are not only fun to eat but also packed with nutrients.
These little bites are customizable, allowing you to use any combination of your favorite vegetables like bell peppers, cucumbers, and tomatoes. The flavor of the hummus pairs wonderfully with the fresh veggies, making this a satisfying meal that can be enjoyed at home or on the go.
Ingredients
- 4 mini whole wheat pita breads
- 1 cup hummus (store-bought or homemade)
- 1/2 cup diced bell peppers (any color)
- 1/2 cup diced cucumbers
- 1/2 cup cherry tomatoes, halved
- 1/4 cup shredded carrots
- Fresh cilantro or parsley for garnish
Instructions
- Prepare the Pita: Cut each mini pita bread in half to create pockets.
- Fill with Hummus: Generously spread hummus inside each pita half.
- Stuff with Veggies: Add diced bell peppers, cucumbers, cherry tomatoes, and shredded carrots to the hummus-filled pitas.
- Garnish: Sprinkle fresh cilantro or parsley on top for added flavor and freshness.
- Pack up: Place the filled pita pockets in a lunchbox for a quick, on-the-go meal!
Fruit and Nut Energy Bites
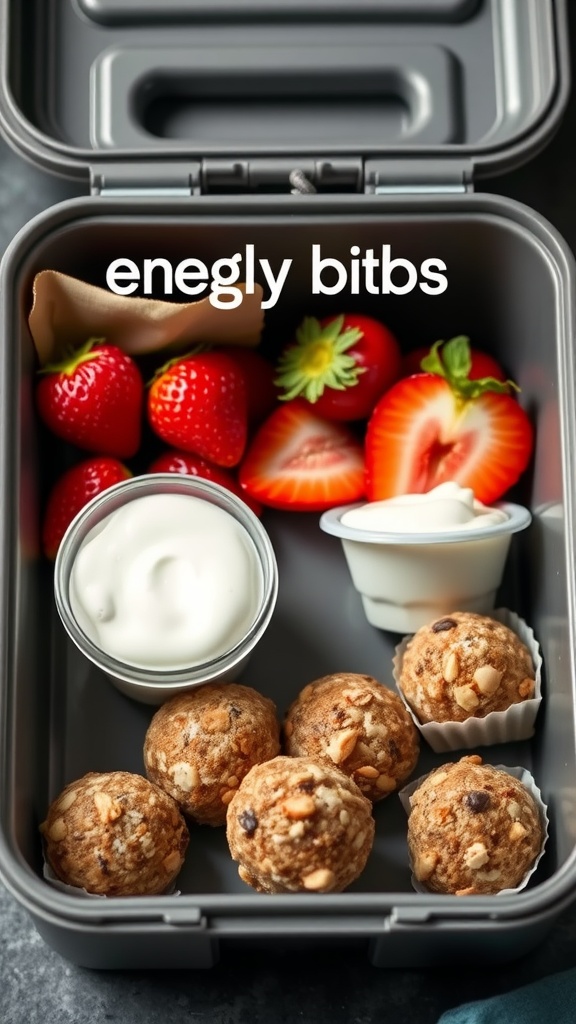
Fruit and nut energy bites are a delicious snack that packs a punch of flavor and nutrition. They are easy to make and are perfect for lunchboxes, offering a great blend of sweetness from the fruit and crunch from the nuts. These bites are not just tasty; they provide a quick energy boost to keep you going throughout the day.
With a few simple ingredients, you can whip up these energy bites in no time. They’re versatile too; you can mix and match your favorite nuts and dried fruits for a personalized treat. Enjoy them as a snack, dessert, or a quick breakfast on-the-go!
Ingredients
- 1 cup rolled oats
- 1/2 cup almond butter (or peanut butter)
- 1/3 cup honey or maple syrup
- 1/2 cup mixed nuts, chopped (such as almonds, walnuts, or pecans)
- 1/4 cup dried fruit (like cranberries, raisins, or apricots)
- 1/4 cup mini chocolate chips (optional)
- 1 teaspoon vanilla extract
Instructions
- Mix Ingredients: In a large bowl, combine rolled oats, almond butter, honey, chopped nuts, dried fruit, chocolate chips, and vanilla extract. Stir until well combined.
- Form Bites: Using your hands, roll the mixture into small balls about 1 inch in diameter. If the mixture is too sticky, you can dampen your hands slightly for easier handling.
- Chill: Place the rolled energy bites on a baking sheet lined with parchment paper. Refrigerate for about 30 minutes to firm them up.
- Store: Once chilled, transfer the energy bites to an airtight container. They can be stored in the refrigerator for up to a week or frozen for longer storage.
Vegetable Stir-Fry with Brown Rice
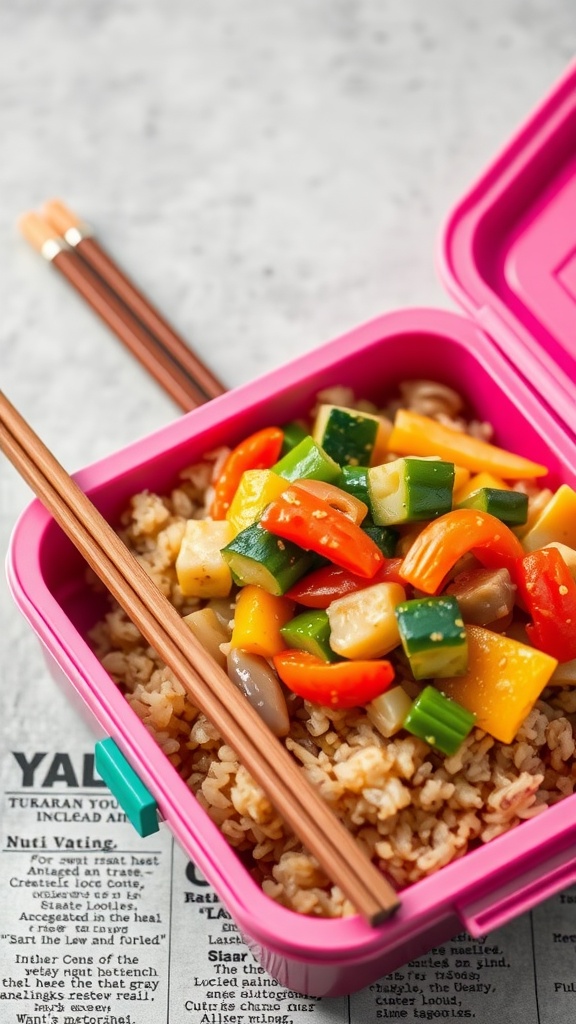
This vegetable stir-fry with brown rice is a quick and easy meal, perfect for busy weekdays. The mix of colorful veggies brings freshness, while the brown rice adds a hearty base that keeps you full. With a delightful balance of flavors, it’s both nutritious and satisfying.
Simply toss your favorite vegetables in a hot pan, add some sauce, and serve over brown rice for a delicious lunchbox option. It’s a real crowd-pleaser!
Ingredients
- 1 cup brown rice
- 2 cups water
- 2 tablespoons vegetable oil
- 1 bell pepper, sliced
- 1 zucchini, sliced
- 1 cup broccoli florets
- 1 carrot, sliced
- 2 cloves garlic, minced
- 2 tablespoons soy sauce
- 1 tablespoon sesame oil
- Salt and pepper to taste
Instructions
- Cook the Rice: In a pot, combine brown rice and water. Bring to a boil, reduce heat, cover, and simmer for about 45 minutes or until water is absorbed. Fluff with a fork.
- Prepare the Vegetables: Heat vegetable oil in a large skillet over medium-high heat. Add garlic and sauté for 30 seconds until fragrant.
- Add the Veggies: Toss in bell pepper, zucchini, broccoli, and carrot. Stir-fry for about 5-7 minutes until veggies are tender but still crisp.
- Flavor It Up: Pour in soy sauce and sesame oil. Stir well to combine, adding salt and pepper to taste.
- Serve: Spoon the vegetable stir-fry over the cooked brown rice. Enjoy warm or pack it up for lunch!