9 Delicious and Nutritious Lunchbox Ideas Kids Will Adore
Keeping kids excited about lunchtime can be a challenge, but we’ve got you covered! Here are 9 healthy lunchbox ideas that are not only nutritious but also super tasty. Say goodbye to boring sandwiches and hello to meals that your kids will actually look forward to enjoying. Let’s make lunchtime fun!
Fruit and Yogurt Parfait
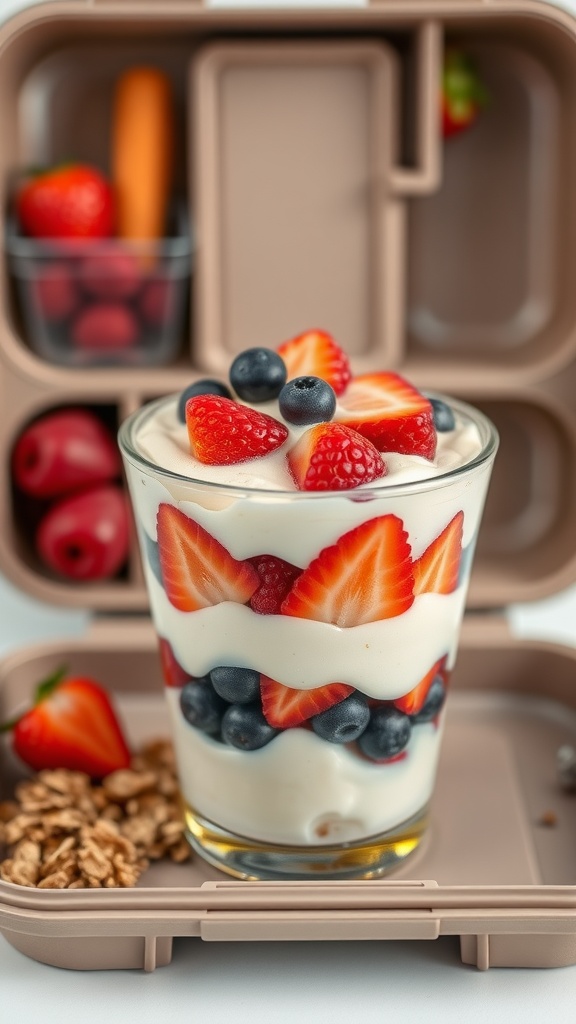
Fruit and yogurt parfaits are a delicious and healthy option for kids’ lunchboxes. They combine creamy yogurt, fresh fruits, and crunchy granola, creating a tasty treat that’s both satisfying and nutritious. This recipe is super simple to whip up, making it a great choice for busy mornings.
Kids will love the colorful layers and the sweet flavors of the fruits. Plus, this parfait can be customized to include their favorite toppings, so it never gets boring. It’s a perfect way to sneak in some vitamins while keeping lunchtime fun!
Ingredients
- 2 cups yogurt (plain or flavored)
- 1 cup mixed berries (strawberries, blueberries, raspberries)
- 1 cup granola
- 1 tablespoon honey (optional)
- Mint leaves for garnish (optional)
Instructions
- Start by washing and slicing the berries as needed.
- In a glass or a bowl, layer half of the yogurt at the bottom.
- Add a layer of granola on top of the yogurt, followed by a layer of mixed berries.
- Repeat the layers with the remaining yogurt, granola, and berries.
- If desired, drizzle honey on top and garnish with mint leaves.
- Serve immediately or pack in a lunchbox for later enjoyment!
Turkey and Cheese Roll-Ups
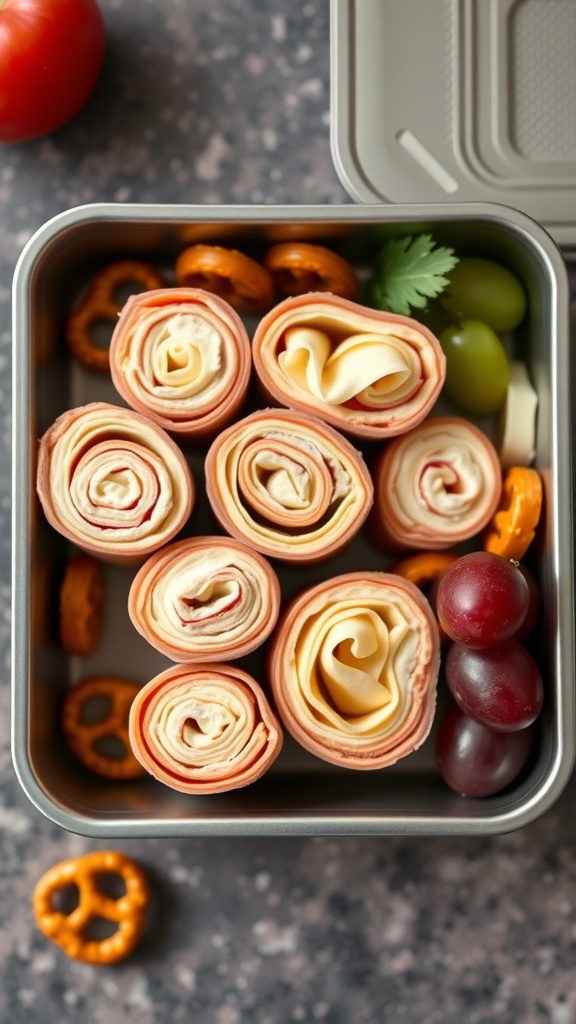
Turkey and cheese roll-ups are a tasty, easy option for lunchboxes that kids will adore. These simple treats combine the savory flavor of turkey with the creamy goodness of cheese, making for a delightful bite every time.
They are not only quick to prepare, but they also provide a healthy dose of protein. You can customize them with various cheeses or even add a bit of cream cheese for extra richness. Perfect for busy mornings, these roll-ups can be made in minutes and are sure to please even the pickiest eaters!
Ingredients
- 8 slices of turkey breast
- 4 slices of cheese (cheddar, Swiss, or your choice)
- 1 tablespoon cream cheese (optional)
- 1/2 cup of bell peppers, sliced (optional)
- Salt and pepper to taste
Instructions
- Prep the Ingredients: Lay out the turkey slices flat on a clean surface. If using, spread a thin layer of cream cheese on each slice.
- Add Cheese: Place a slice of cheese on top of each turkey slice. If you like, add a few slices of bell pepper for some crunch.
- Roll Them Up: Starting from one end, carefully roll each turkey and cheese slice into a tight cylinder.
- Slice and Serve: Cut the rolled-up slices in half for easier handling, then pack them into a lunchbox. They can be enjoyed cold or at room temperature.
Cheesy Spinach Stuffed Whole Wheat Pita
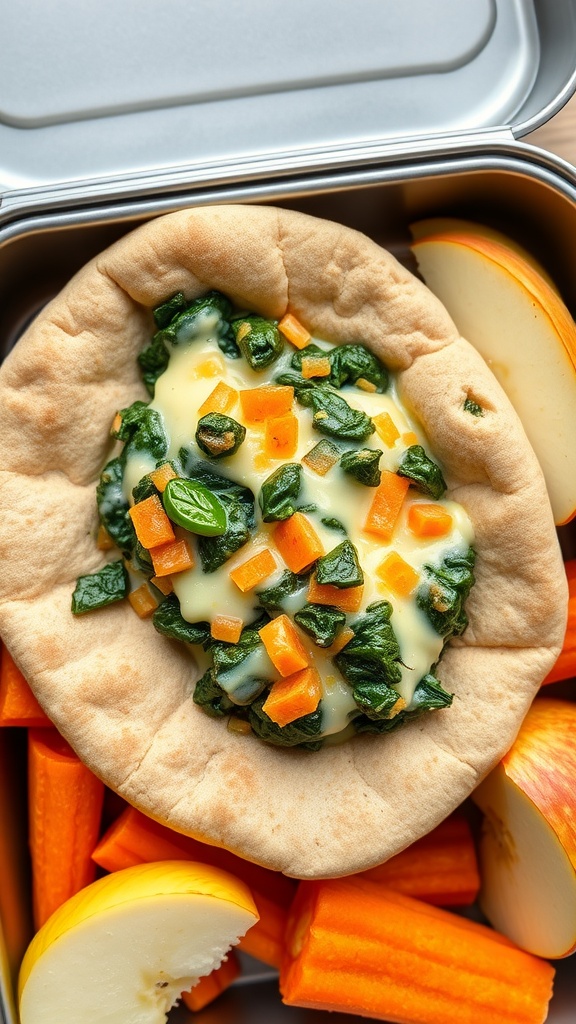
These cheesy spinach stuffed whole wheat pitas are a delightful way to get kids excited about lunch. The creamy cheese blends perfectly with fresh spinach and crunchy veggies, creating a satisfying and nutritious meal that kids will actually want to eat. Plus, they are super easy to make, giving you more time to enjoy the day!
With delicious flavors and a fun, handheld format, these pitas are sure to become a lunchtime favorite. They’re perfect for packing in a lunchbox, served warm or cold, and can be customized with different veggies or spices based on your kids’ preferences.
Ingredients
- 4 whole wheat pitas
- 2 cups fresh spinach, chopped
- 1/2 cup diced carrots
- 1 cup shredded cheese (like mozzarella or cheddar)
- 1 tablespoon olive oil
- 1/2 teaspoon garlic powder
- Salt and pepper to taste
Instructions
- Heat olive oil in a skillet over medium heat. Add the chopped spinach and diced carrots. Sauté until the spinach is wilted and the carrots are tender, about 3-4 minutes.
- Stir in garlic powder, salt, and pepper. Remove from heat and let it cool slightly.
- In a bowl, mix the sautéed vegetables with shredded cheese until well combined.
- Carefully cut the top of each pita to create a pocket. Stuff each pita with the cheesy spinach mixture.
- Enjoy immediately, or pack in a lunchbox for later!
Colorful Veggie Wraps with Hummus
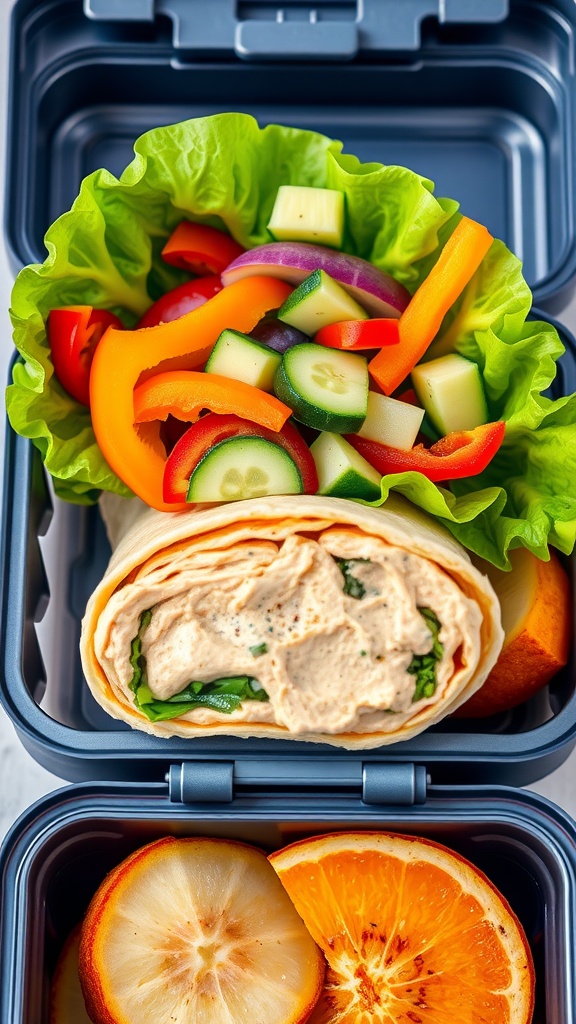
Colorful veggie wraps with hummus are a fun and tasty lunch option that kids will love! Packed with fresh vegetables and creamy hummus, these wraps are not only delicious but also simple to prepare. The vibrant colors make them visually appealing, and the crunchy texture of the veggies paired with the smooth hummus creates a perfect balance.
This recipe is quick to make, making it ideal for busy mornings. You can customize the fillings based on your kids’ favorite veggies and even add some protein for a more filling option. Plus, these wraps are great for meal prep, allowing you to whip up several at once for the week ahead.
Ingredients
- 1 large whole wheat tortilla
- 1/2 cup hummus
- 1/4 cup spinach leaves
- 1/4 cup shredded carrots
- 1/4 cup cucumber, diced
- 1/4 cup bell peppers, sliced
- 1/4 cup cherry tomatoes, halved
- Salt and pepper to taste
Instructions
- Spread the hummus evenly over the tortilla, leaving a small border around the edges.
- Layer the spinach leaves, shredded carrots, diced cucumber, sliced bell peppers, and cherry tomatoes on top of the hummus.
- Season with a pinch of salt and pepper if desired.
- Carefully roll up the tortilla tightly, starting from one edge and rolling to the opposite edge.
- Slice the wrap in half and pack it into a lunchbox with additional fruits or veggies for a complete meal.
Cucumber Sushi Rolls
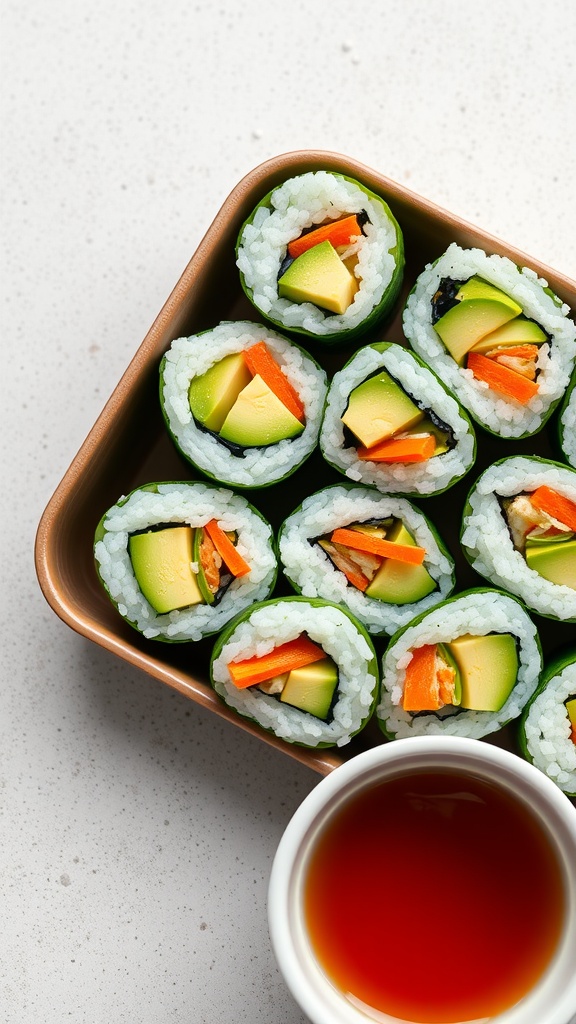
Cucumber sushi rolls are a fun and healthy twist on traditional sushi. These fresh rolls are bursting with flavor from crisp vegetables and creamy avocado, all wrapped in a refreshing cucumber shell. They are easy to make and perfect for kids, offering a delightful snack that they can enjoy during lunch or as an after-school treat.
With their vibrant colors and crunchy texture, these cucumber sushi rolls are not only visually appealing but also packed with nutrients. Kids will love the opportunity to personalize their rolls with their favorite fillings. Plus, they can be made ahead of time and are great for on-the-go lunches!
Ingredients
- 1 large cucumber
- 1 cup sushi rice
- 1 1/4 cups water
- 1 tablespoon rice vinegar
- 1/2 teaspoon salt
- 1/2 avocado, sliced
- 1 small carrot, julienned
- 1/4 bell pepper, thinly sliced
- Soy sauce (for dipping)
Instructions
- Cook the Rice: Rinse the sushi rice under cold water until the water runs clear. In a pot, combine the rice and water; bring to a boil. Reduce heat to low, cover, and let simmer for about 20 minutes or until the water is absorbed. Remove from heat and let it cool.
- Season the Rice: Once cooled, mix the rice vinegar and salt into the rice until well combined.
- Prepare the Cucumber: Slice the cucumber lengthwise and scoop out the seeds using a spoon, creating a hollow center.
- Assemble the Rolls: Spoon the seasoned rice into the cucumber pieces, pressing it down gently. Layer the avocado, carrot, and bell pepper inside the rice.
- Slice and Serve: Cut the cucumber rolls into bite-sized pieces. Serve with soy sauce for dipping.
Mini Quinoa and Black Bean Salad
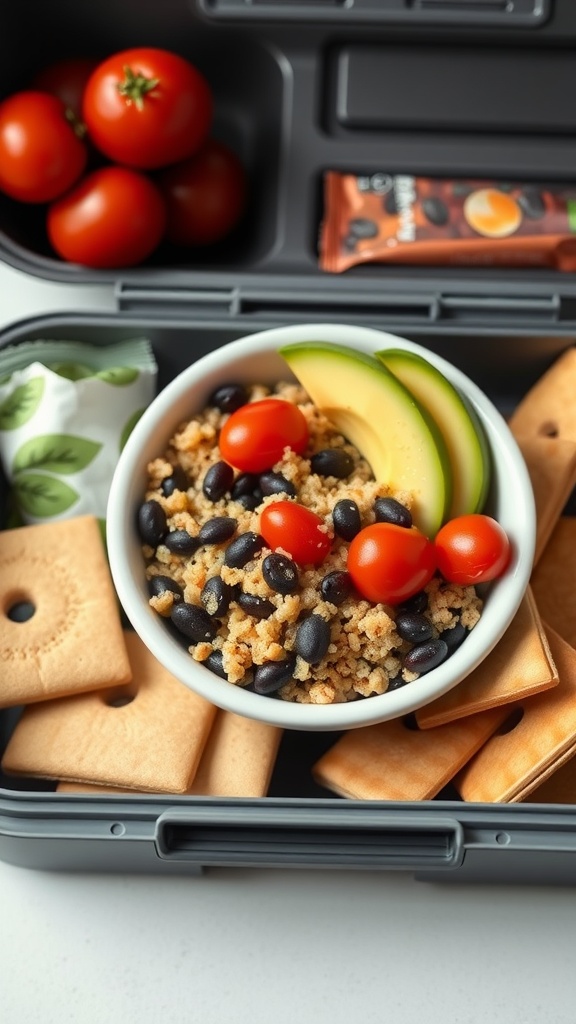
Mini quinoa and black bean salad is a fun and nutritious choice for your kid’s lunchbox. This dish offers a delightful mix of textures and flavors, with fluffy quinoa paired with hearty black beans. It’s not only delicious but also packed with protein and fiber, ensuring that kids stay energized throughout the day.
Making this salad is super simple! You can prepare it in advance, store it in individual containers, and it tastes great even after a day in the fridge. Just toss in some cherry tomatoes and slices of avocado for added freshness and a pop of color. It’s sure to be a hit!
Ingredients
- 1 cup cooked quinoa
- 1 can (15 oz) black beans, rinsed and drained
- 1 cup cherry tomatoes, halved
- 1 avocado, diced
- 1/4 cup chopped cilantro
- Juice of 1 lime
- 1 tablespoon olive oil
- Salt and pepper to taste
Instructions
- In a large bowl, combine the cooked quinoa and black beans.
- Add the halved cherry tomatoes, diced avocado, and chopped cilantro.
- Drizzle with lime juice and olive oil, then season with salt and pepper.
- Toss everything gently to combine, ensuring the avocado stays intact.
- Pack into lunch containers and enjoy fresh or chilled!
Homemade Pizza Muffins
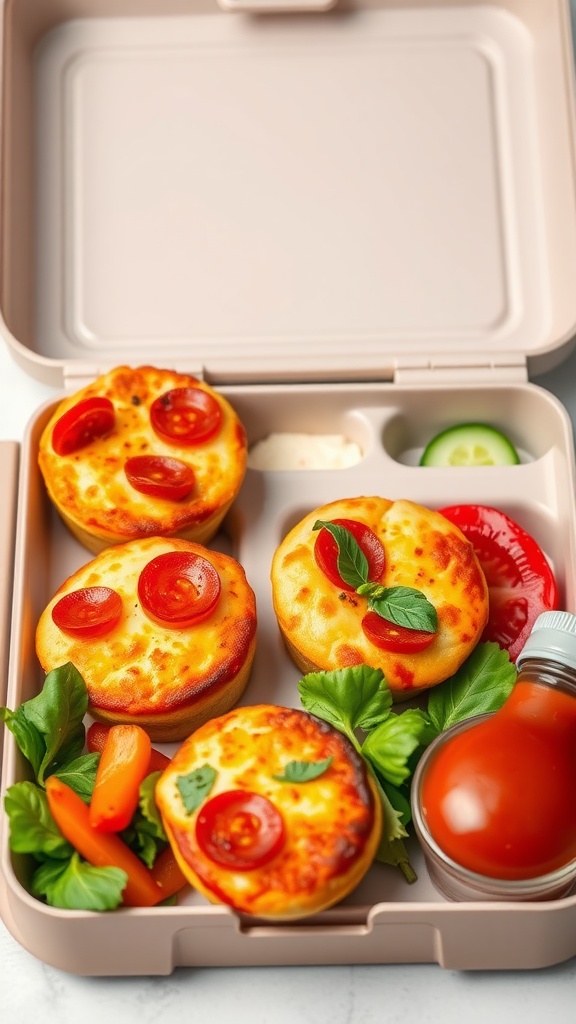
Homemade pizza muffins are a fun and tasty twist on traditional pizza that kids love! These mini muffins are packed with all the classic pizza flavors—think gooey cheese, savory tomato sauce, and your choice of toppings. They’re soft, fluffy, and oh-so-delicious, making them perfect for lunchboxes.
What’s great about these muffins is how easy they are to whip up. You can involve the kids in the kitchen for a fun activity, letting them customize their muffins with their favorite toppings. Plus, they’re a fantastic way to sneak in some veggies!
Ingredients
- 1 ½ cups all-purpose flour
- 2 teaspoons baking powder
- 1 teaspoon garlic powder
- ½ teaspoon salt
- 1 cup shredded mozzarella cheese
- 1 cup milk
- 2 large eggs
- ¼ cup olive oil
- ½ cup pizza sauce
- Your choice of toppings (pepperoni, bell peppers, olives, etc.)
Instructions
- Preheat your oven to 375°F (190°C) and grease a muffin tin.
- In a large bowl, combine flour, baking powder, garlic powder, and salt. Mix well.
- Add the mozzarella cheese, milk, eggs, and olive oil to the dry ingredients. Stir until just combined.
- Fold in the pizza sauce and any additional toppings you want.
- Pour the batter into the muffin tin, filling each cup about two-thirds full.
- Bake for 15-20 minutes, or until the muffins are golden and a toothpick inserted comes out clean.
- Let them cool slightly before removing from the tin. Serve warm or pack them in lunchboxes for a tasty treat!
Baked Sweet Potato Chips
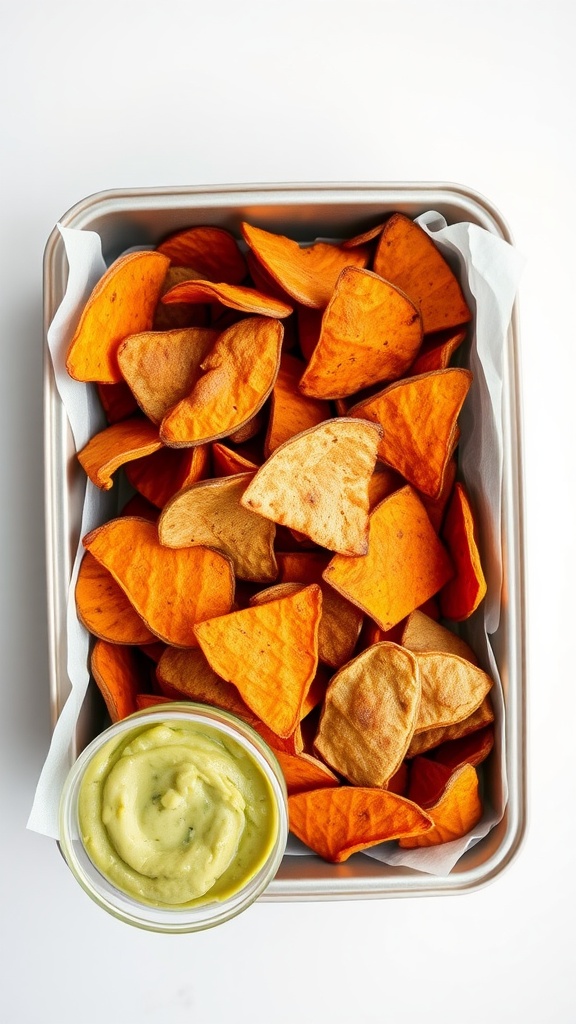
Baked sweet potato chips are a crispy, tasty snack that kids will adore. They offer a delicious twist on regular chips, combining a naturally sweet flavor with a satisfying crunch. Plus, they’re super simple to make, making them a great option for busy parents.
These chips are perfect for lunchboxes or as an after-school snack. With just a few ingredients and some easy steps, you can whip up a batch that’s healthier than store-bought alternatives. Pair them with a tasty dip or enjoy them on their own!
Ingredients
- 2 large sweet potatoes
- 2 tablespoons olive oil
- 1 teaspoon sea salt
- 1/2 teaspoon paprika (optional)
- Dipping sauce (such as guacamole or hummus)
Instructions
- Preheat your oven to 400°F (200°C) and line a baking sheet with parchment paper.
- Wash and peel the sweet potatoes. Slice them thinly using a mandoline or a sharp knife for even cooking.
- In a bowl, toss the sweet potato slices with olive oil, sea salt, and paprika until evenly coated.
- Spread the slices out in a single layer on the baking sheet, ensuring they aren’t overlapping.
- Bake for about 20-25 minutes, flipping halfway through, until they are crispy and lightly golden.
- Let them cool slightly before serving with your favorite dip.
Peanut Butter Banana Energy Bites
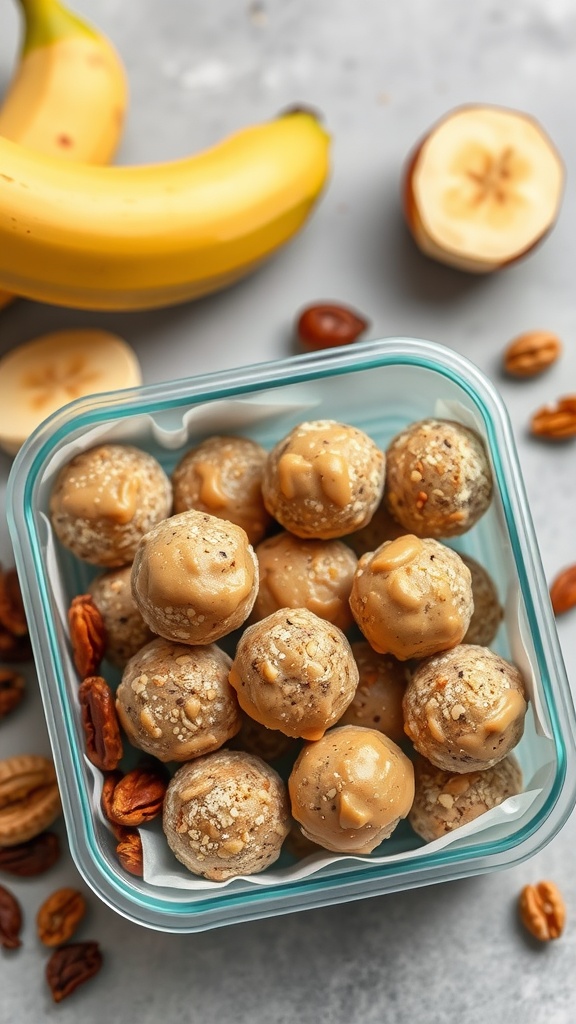
Peanut Butter Banana Energy Bites are a tasty and nutritious snack your kids will adore. These little bites are packed with the sweet flavor of bananas and the creamy goodness of peanut butter, making them both satisfying and delightful. Plus, they’re super easy to whip up!
Simply combine the ingredients, roll them into bite-sized balls, and you’re set! These energy bites make for a perfect lunchbox treat or an after-school snack that keeps kids energized and happy. Enjoy the combination of wholesome oats and rich peanut butter, and watch your kids enjoy every bite!
Ingredients
- 1 ripe banana, mashed
- 1 cup rolled oats
- 1/2 cup peanut butter
- 1/4 cup honey or maple syrup
- 1/4 cup mini chocolate chips (optional)
- 1/4 cup chopped nuts (optional)
Instructions
- In a medium bowl, mix the mashed banana with peanut butter and honey until well combined.
- Stir in the rolled oats until the mixture is evenly mixed. If desired, add chocolate chips and nuts.
- Using your hands, roll the mixture into small balls, about 1 inch in diameter.
- Place the energy bites on a plate and refrigerate for at least 30 minutes to firm up.
- Store in an airtight container in the fridge for up to a week. Enjoy!